Tax Integrations
This document provides a step-by-step guide for managing Tax Integrations in the Exigo Admin portal.
Overview
Tax Integrations connect Exigo to external tax-calculation services that compute real-time, jurisdiction-accurate tax amounts during order processing. Rather than relying on a flat VAT percentage per country (see Country VAT), a tax integration delegates the tax calculation to a third-party engine that accounts for product taxability, nexus, jurisdiction layering (state / county / city / special district), exemption certificates, and more.
When a tax integration is configured:
- Exigo sends the order's ship-to address, line items, and freight totals to the integration endpoint.
- The external service returns the calculated tax per line.
- Exigo applies the returned tax to the order before charging the customer.
- Optionally, Exigo commits (finalizes) the transaction in the tax provider so the provider can include it in tax returns and remittance reports.
Tax integrations are particularly important for companies selling in the United States (where sales tax is state- and locality-specific) and for any jurisdiction that requires tax-return filing through a licensed tax engine.
Accessing Tax Integrations
Navigation Path
- Log in to the Exigo Admin portal.
- Navigate to Administration > Settings.
- Select the ACCOUNTING SETTINGS tab.
- Scroll down to the Tax Integrations section (located after Merchant and before Payment Card).
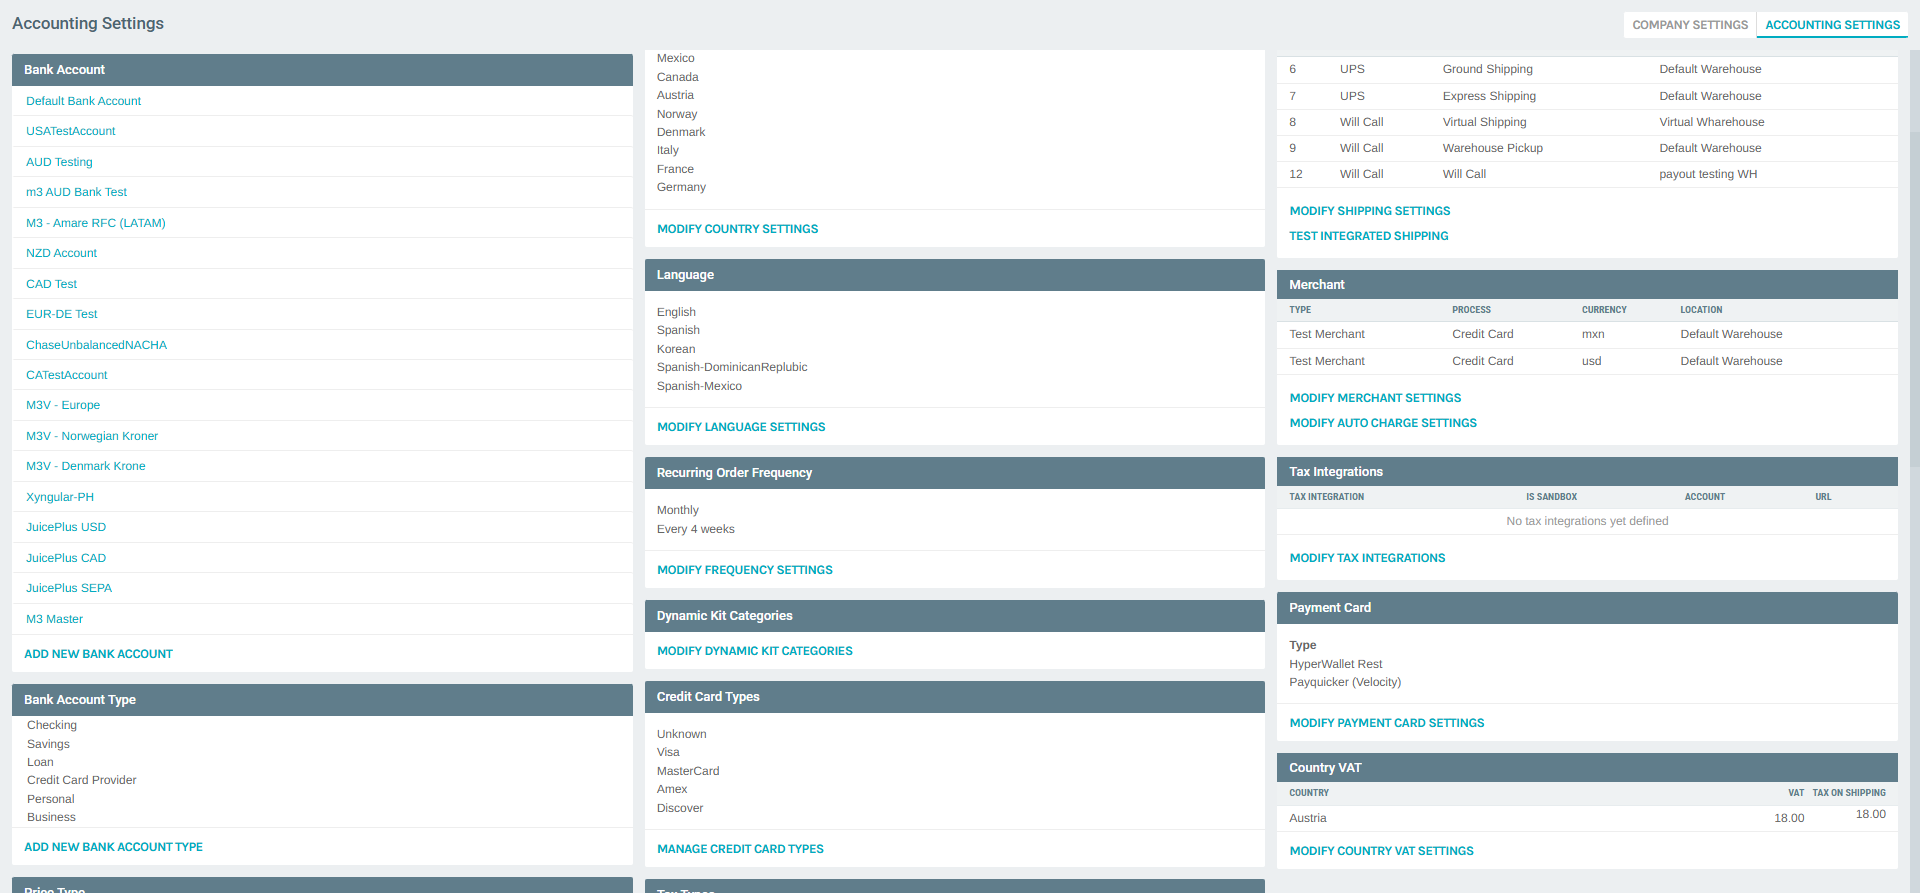
The summary panel displays a table with columns TAX INTEGRATION, IS SANDBOX, ACCOUNT, and URL. If no integrations have been configured, the table shows "No tax integrations yet defined."
Click MODIFY TAX INTEGRATIONS to open the management dialog.
Viewing Configured Tax Integrations
The Tax Integrations list dialog shows all configured integrations with the following columns:
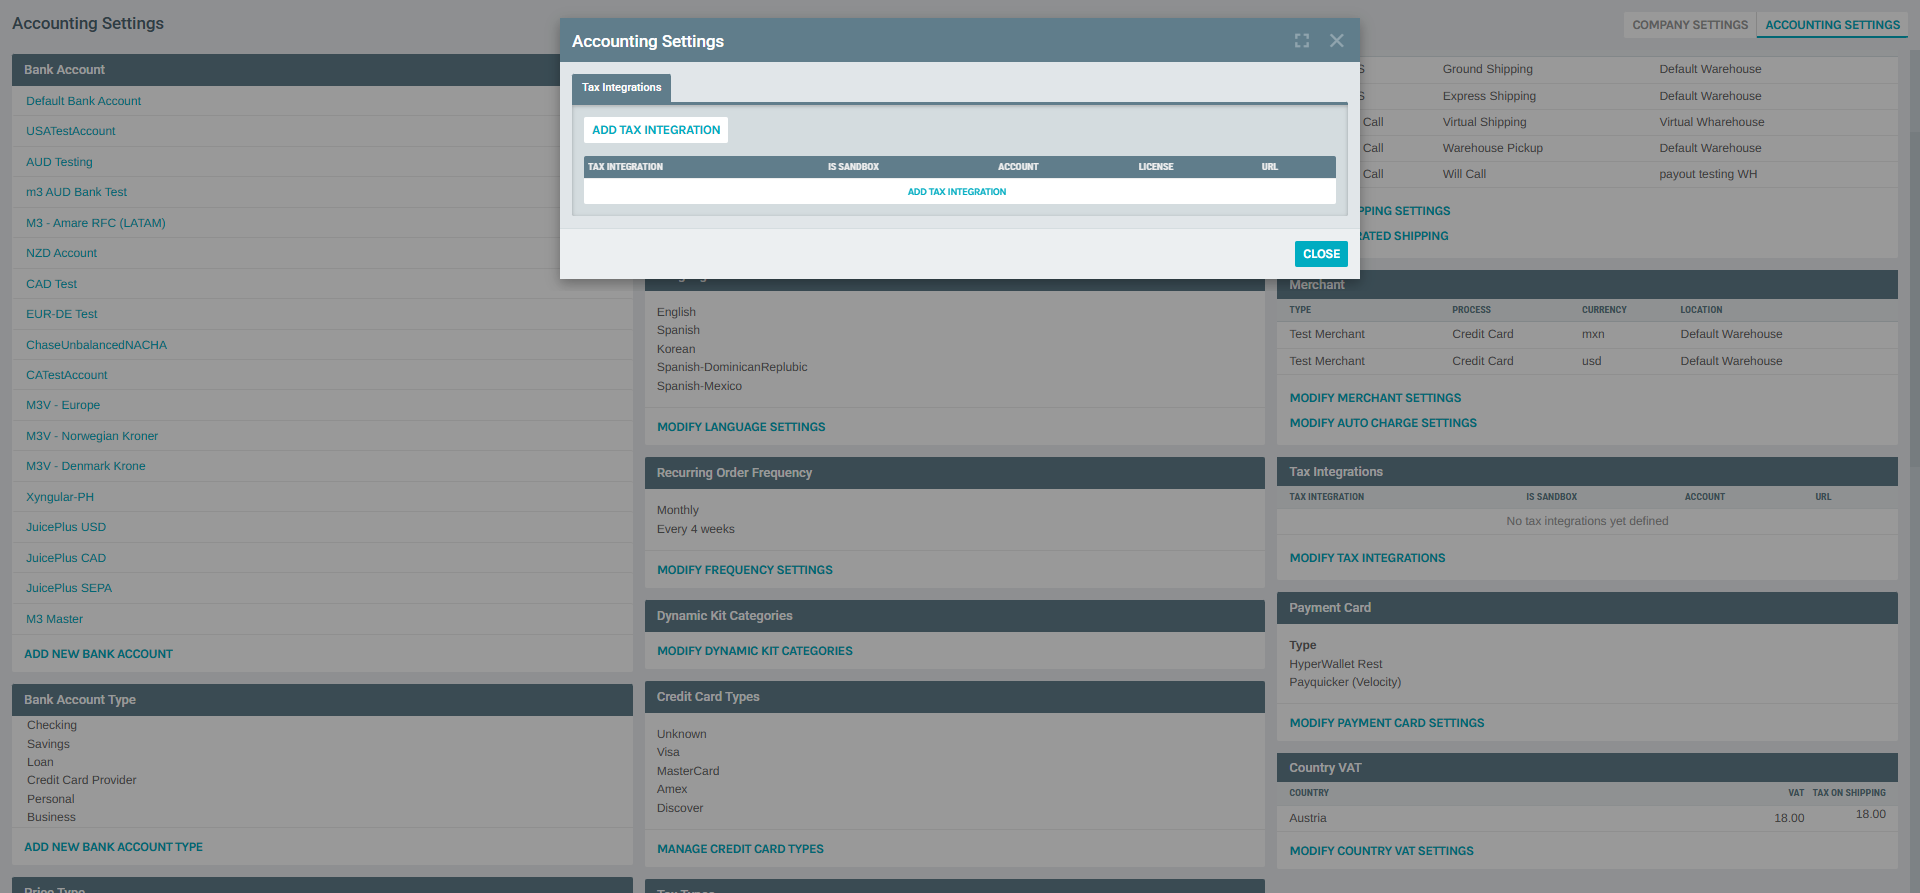
| Column | Description |
|---|---|
| Tax Integration | The provider type (e.g., Avalara/AvaTax, Vertex). |
| Is Sandbox | Whether the integration is pointed at the provider's sandbox environment. |
| Account | The account number or identifier with the tax provider. |
| License | The license key for API authentication. |
| URL | The endpoint URL Exigo calls for tax calculations. |
From this dialog you can:
- Click ADD TAX INTEGRATION to configure a new provider connection.
- Click the Edit action on any existing row to modify its settings.
- Click CLOSE to dismiss the dialog.
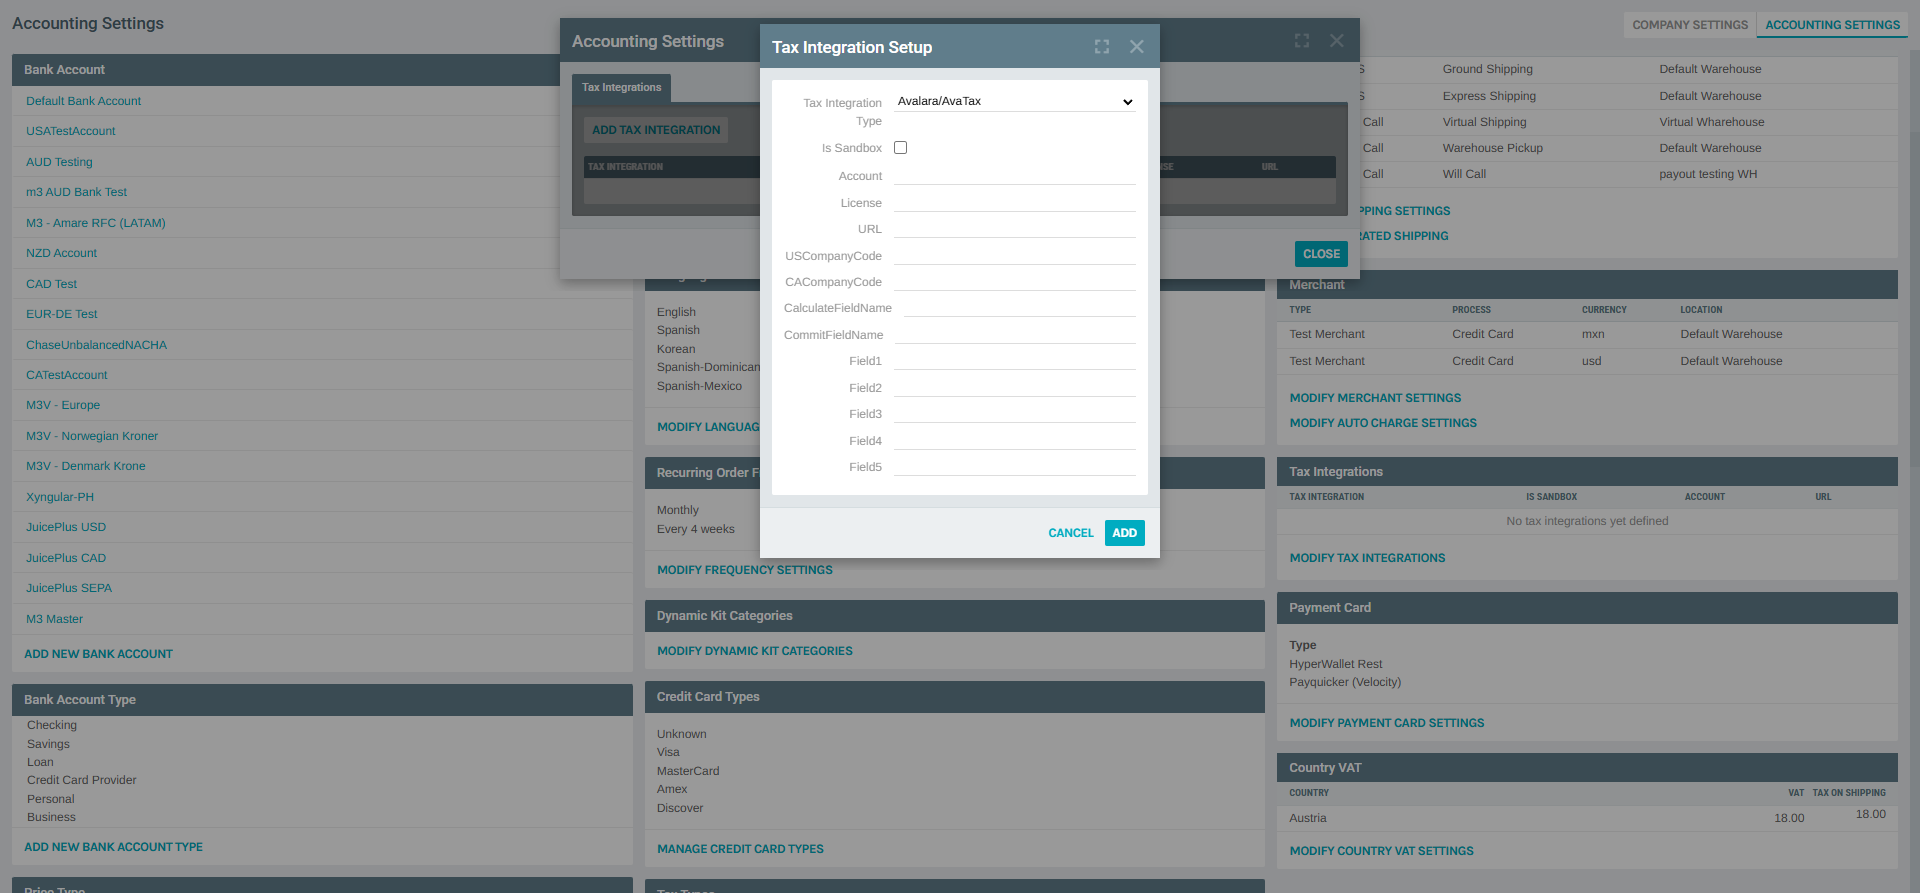
Adding a Tax Integration
Click ADD TAX INTEGRATION from the list dialog. The Tax Integration Setup dialog opens.
Tax Integration Type
A dropdown to select which tax provider to integrate with. Exigo supports the following providers:
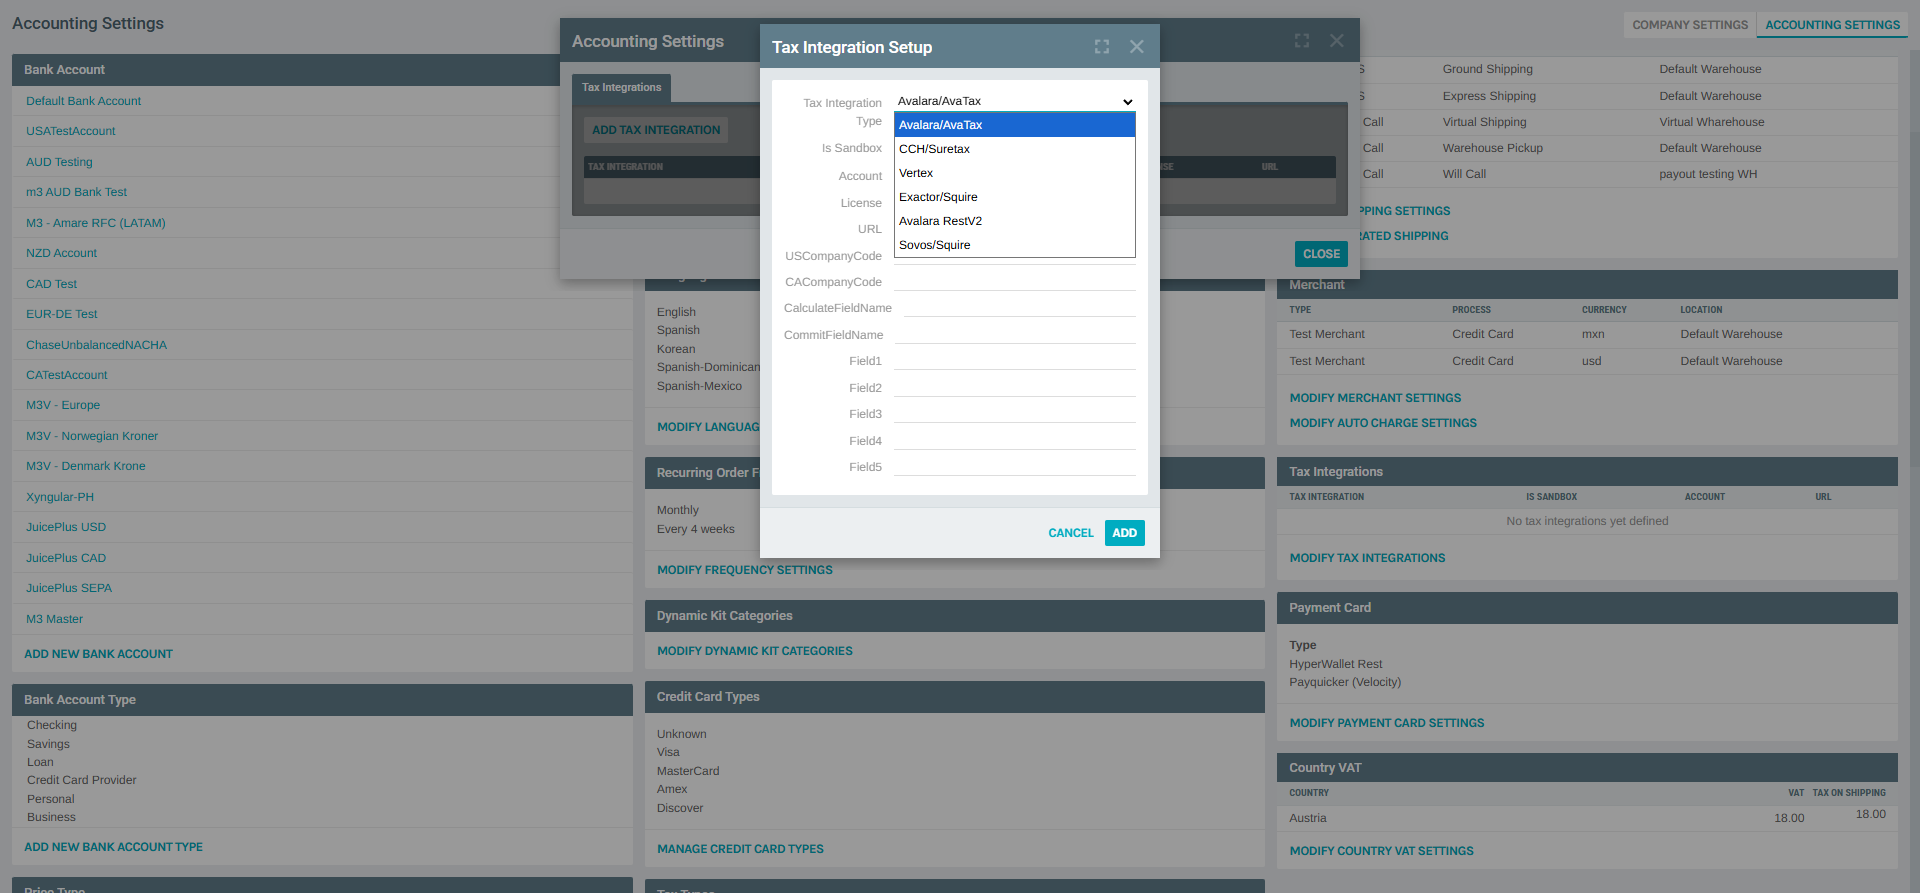
| Provider | Description |
|---|---|
| Avalara/AvaTax | Avalara's legacy SOAP-based AvaTax service for sales & use tax calculation. |
| Avalara RestV2 | Avalara's modern REST v2 API — recommended for new Avalara implementations. |
| CCH/Suretax | Wolters Kluwer CCH SureTax engine for sales, use, and communications tax. |
| Vertex | Vertex O Series or Cloud tax engine for enterprise tax calculation. |
| Exactor/Squire | Legacy Exactor (now Squire) tax calculation service. |
| Sovos/Squire | Sovos tax determination platform (successor to Exactor/Squire). |
The selection determines which provider API Exigo will call when calculating tax at checkout.
Configuration Fields
After selecting the provider, fill in the following fields:
| Field | Required | Description |
|---|---|---|
| Is Sandbox | No | Checkbox. Check to point Exigo at the provider's sandbox/test environment. Uncheck for production. |
| Account | Yes | The account number or company identifier provided by the tax service. |
| License | Yes | The license key or API key for authenticating requests to the provider. |
| URL | Yes | The full endpoint URL Exigo should send calculation requests to (varies by provider and sandbox/production mode). |
| USCompanyCode | Yes | The company code registered in the tax provider for U.S. tax filings. |
| CACompanyCode | Yes | The company code registered in the tax provider for Canadian tax filings. |
| CalculateFieldName | Yes | The API document type or transaction type code used when requesting a tax calculation (pre-commit). |
| CommitFieldName | Yes | The API document type or transaction type code used when committing (finalizing) a tax transaction. |
| Field1 – Field5 | Yes | Provider-specific extended fields. Usage varies by provider (e.g., additional company codes, custom metadata, override settings). Consult the provider's documentation for expected values. |
Click ADD to save the integration. The dialog closes and the new entry appears in the list.
Editing a Tax Integration
From the list dialog, click the Edit action on any row. The Tax Integration Setup dialog opens in edit mode with all fields pre-filled with the current values. Modify any field and click SAVE CHANGES to persist.
The edit dialog also provides a Delete action to remove the integration entirely.
Deleting a Tax Integration
From the edit dialog, click the Delete action. The integration will be removed and Exigo will stop sending tax calculations to that provider.
Deleting disables automated tax calculation
Once deleted, any orders that previously relied on this integration will fall back to the next available tax method (Country VAT flat rates, or no tax if nothing else is configured). Ensure an alternative tax method is in place before removing an integration from production.
Best Practices
- Start in sandbox mode. Always test a new integration with Is Sandbox checked and the sandbox URL before going live. Verify that calculated tax amounts match your expectations for representative orders across multiple jurisdictions.
- Use Avalara RestV2 for new implementations. The legacy Avalara/AvaTax (SOAP) connector is maintained for backward compatibility; the REST v2 API offers better performance and richer features.
- Maintain separate US and CA company codes. U.S. and Canadian tax regimes differ significantly. Even if you use the same provider account, register distinct company codes so that each country's tax filings are reported correctly.
- Coordinate sandbox/production cutover with your provider. Ensure your production account is active, properly licensed, and the URL matches the production endpoint before unchecking Is Sandbox.
- Document Field1–Field5 usage internally. Because these fields are generic placeholders, teams should maintain an internal reference mapping each field to its provider-specific meaning (e.g., "Field1 = Vertex Trusted ID", "Field2 = Override Tax Code").
- Combine with Country VAT only when appropriate. Tax Integrations and Country VAT are separate mechanisms. For countries handled by the integration (e.g., U.S. states), do not also add a Country VAT row — this could result in double taxation. Use Country VAT only for countries that are not covered by the integration.
- Monitor for API credential expiry. Provider API keys and licenses may have expiration dates. Set internal calendar reminders to rotate credentials before they expire to avoid order-processing failures.
Related Concepts
- Country VAT — flat-rate VAT rules for countries that do not require a full tax-engine integration.
- Configuring Item Pricing and Taxation — item-level taxation settings and how pricing interacts with tax calculations.
- Invoice & Statement Setup — templates that render tax breakouts on printed invoices (pair with the VAT Example template for VAT-collecting countries).
- Bank Accounts — the bank account linked to the merchant at checkout receives the tax-inclusive payment.
Notes
- Only one integration per provider type can be active at a time per company. Adding a second Avalara/AvaTax entry will create a new row, not override the first — manage carefully to avoid routing conflicts.
- Tax integration calls happen in real time during order creation. If the provider's API is unreachable or returns an error, the order may fail to process depending on the company's fallback configuration.
- Changes to integration settings (e.g., switching from sandbox to production) take effect immediately on the next order processed — there is no cache or deploy step.
- The CalculateFieldName and CommitFieldName values must match the document types configured in your tax provider's admin console. Mismatches will cause failed tax calls.
- The integration is company-wide — it applies to all storefronts, API clients, and Admin-created orders within the company.