Push Notifications
Overview
Customer > Messaging is the hub for all outbound communications in the Exigo admin panel. Push notifications are delivered as one of three supported channels — alongside Email and SMS — and can be sent either through Auto Responders (event-triggered) or Broadcasts (one-time sends). Each message can activate any combination of these three channels simultaneously.
Accessing the Messaging Portal
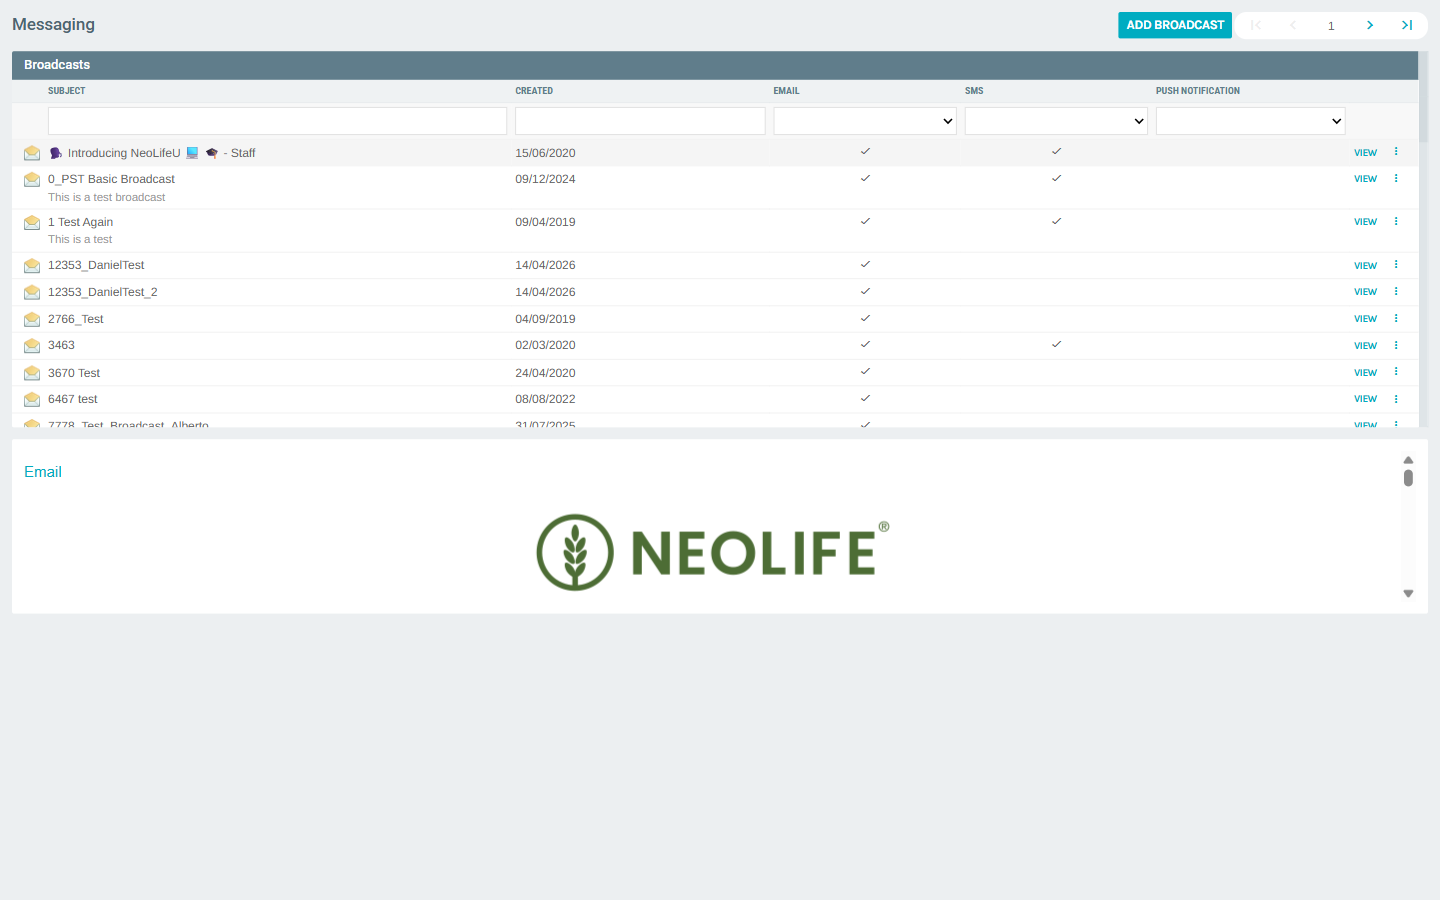
Navigate to Customer > Messaging from the left sidebar.
Portal Layout
The Messaging Portal is organized into two areas:
- Left panel – Quick action buttons (Add Auto Responder, Add Broadcast, Add Email Template) and navigation links to saved lists (Active Auto Responders, All Auto Responders, Broadcasts, Email Templates).
- Right pane – The main content grid for the selected list, with an inline preview pane below showing the content of the selected record.
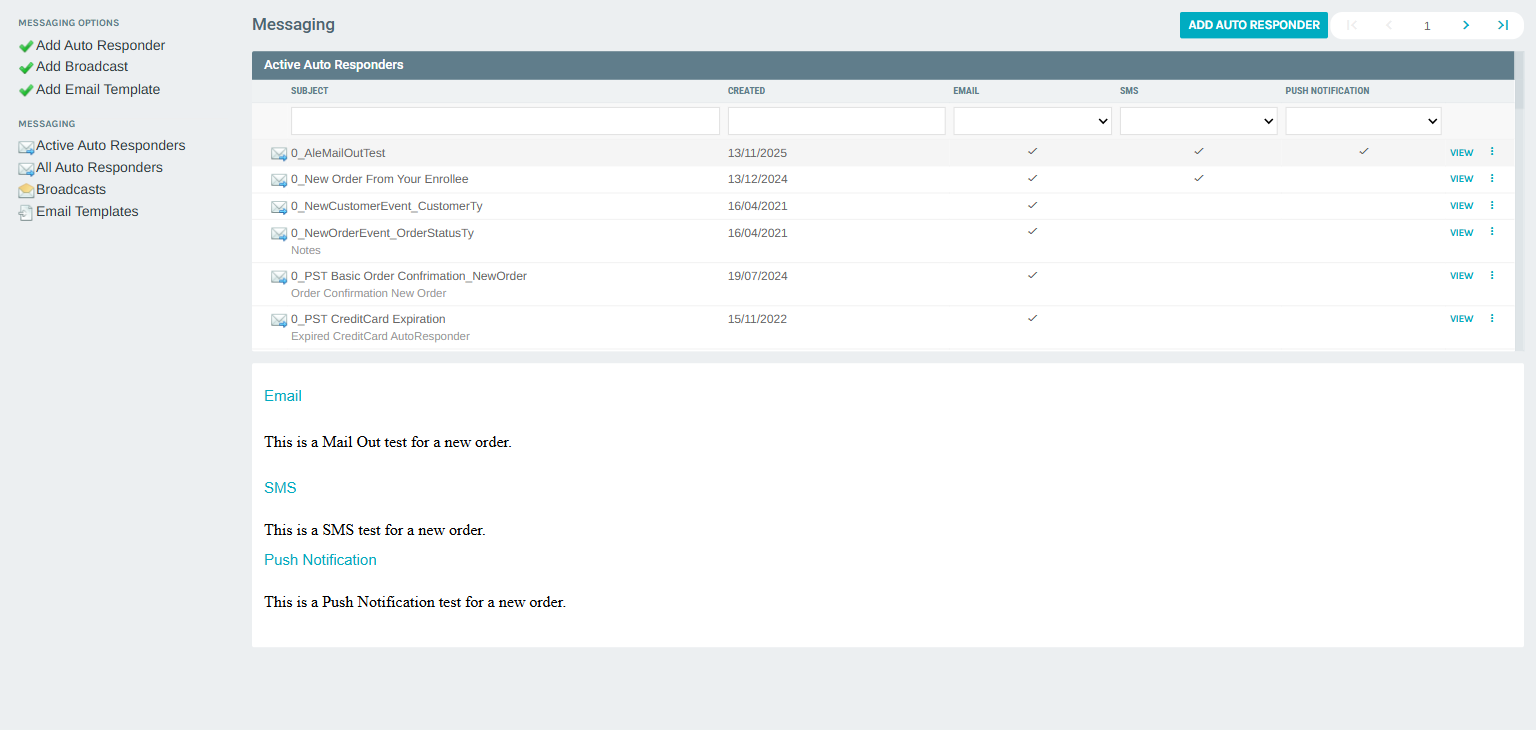
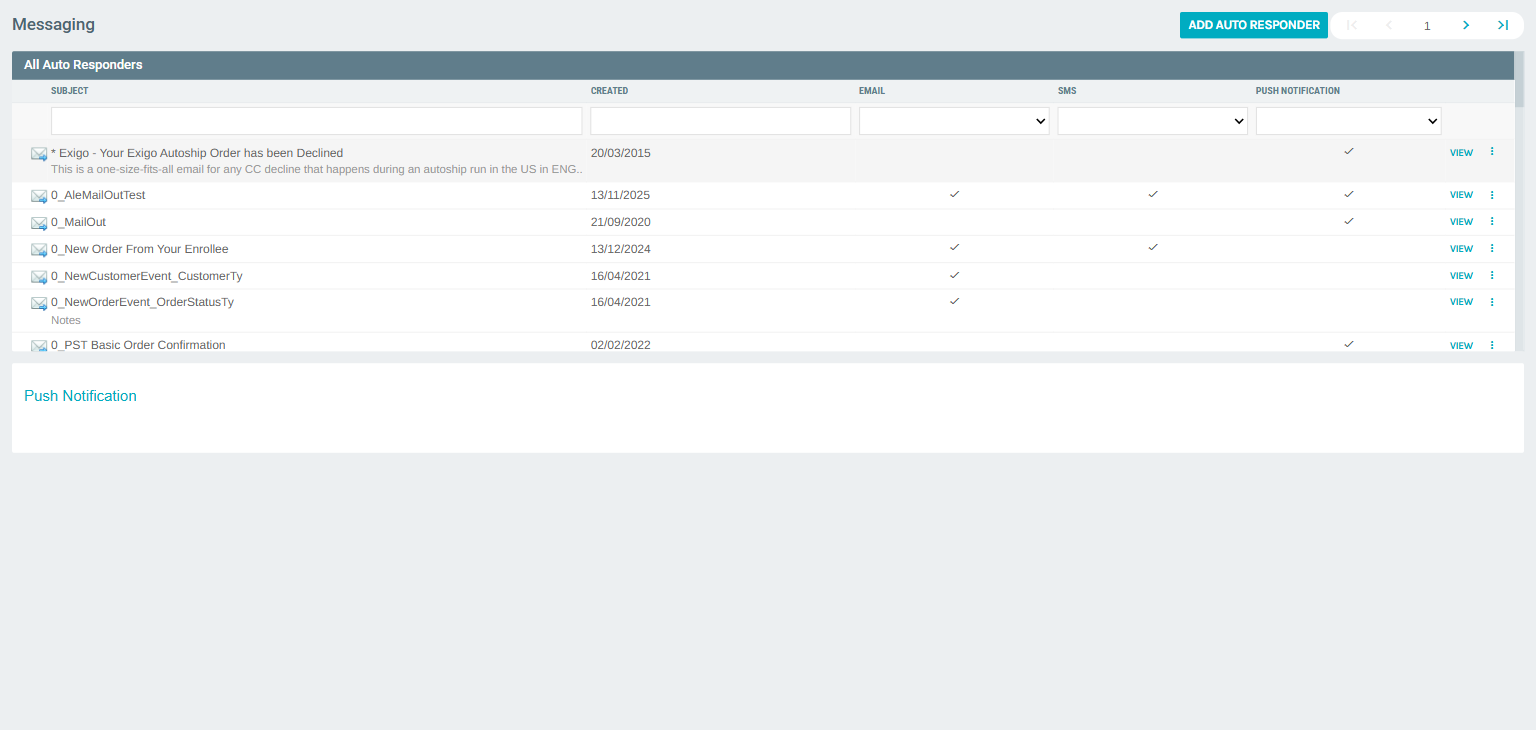
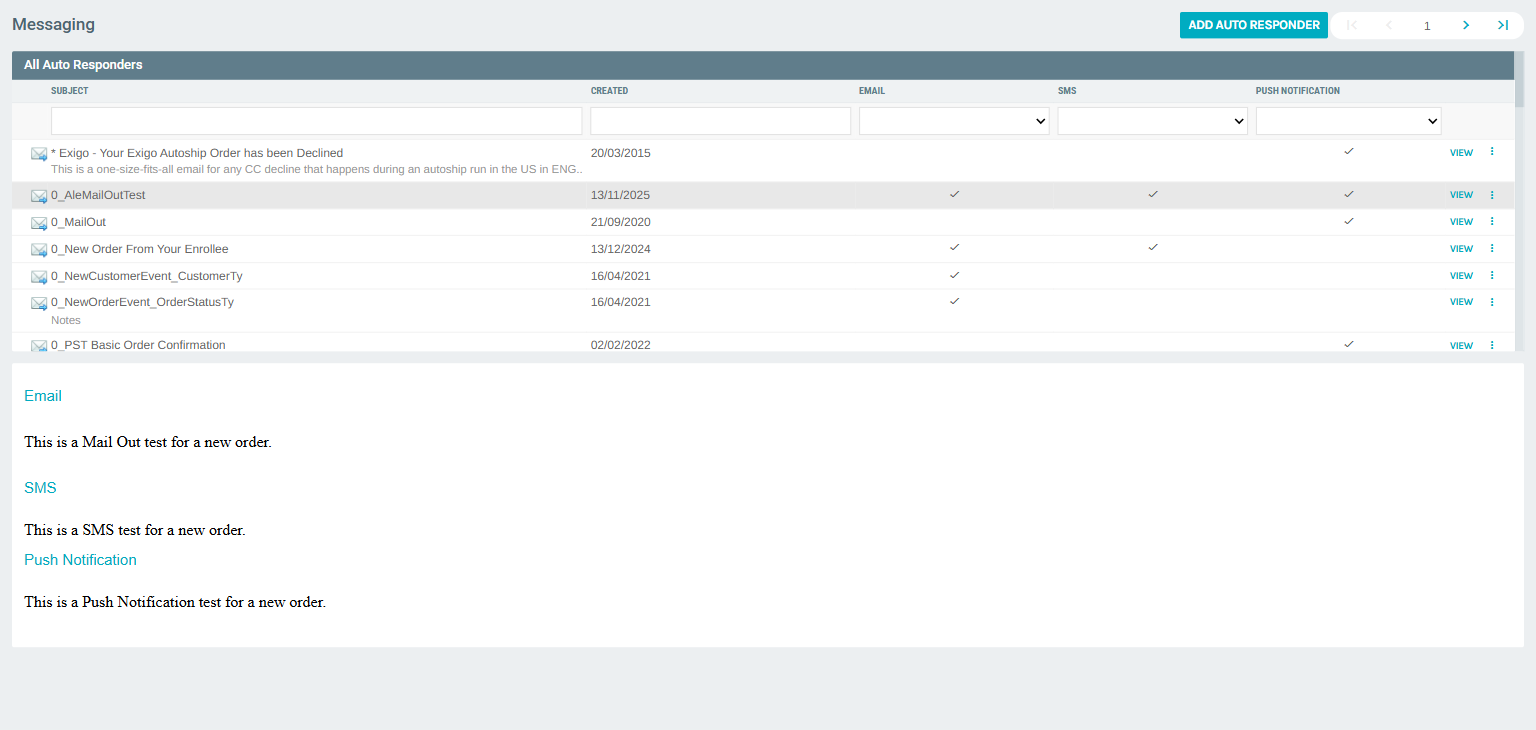
The list grid always shows three channel indicator columns: Email, SMS, and Push Notification. A checkmark in a column means that channel is enabled for that message.
Auto Responders with Push Notifications
Auto Responders are event-driven messages that fire automatically when defined conditions are met. Each auto responder can send across any combination of Email, SMS, and Push Notification.
Inline Detail Preview
Clicking any row in the list loads a preview panel below the grid showing the content for each enabled channel.
Creating a New Auto Responder
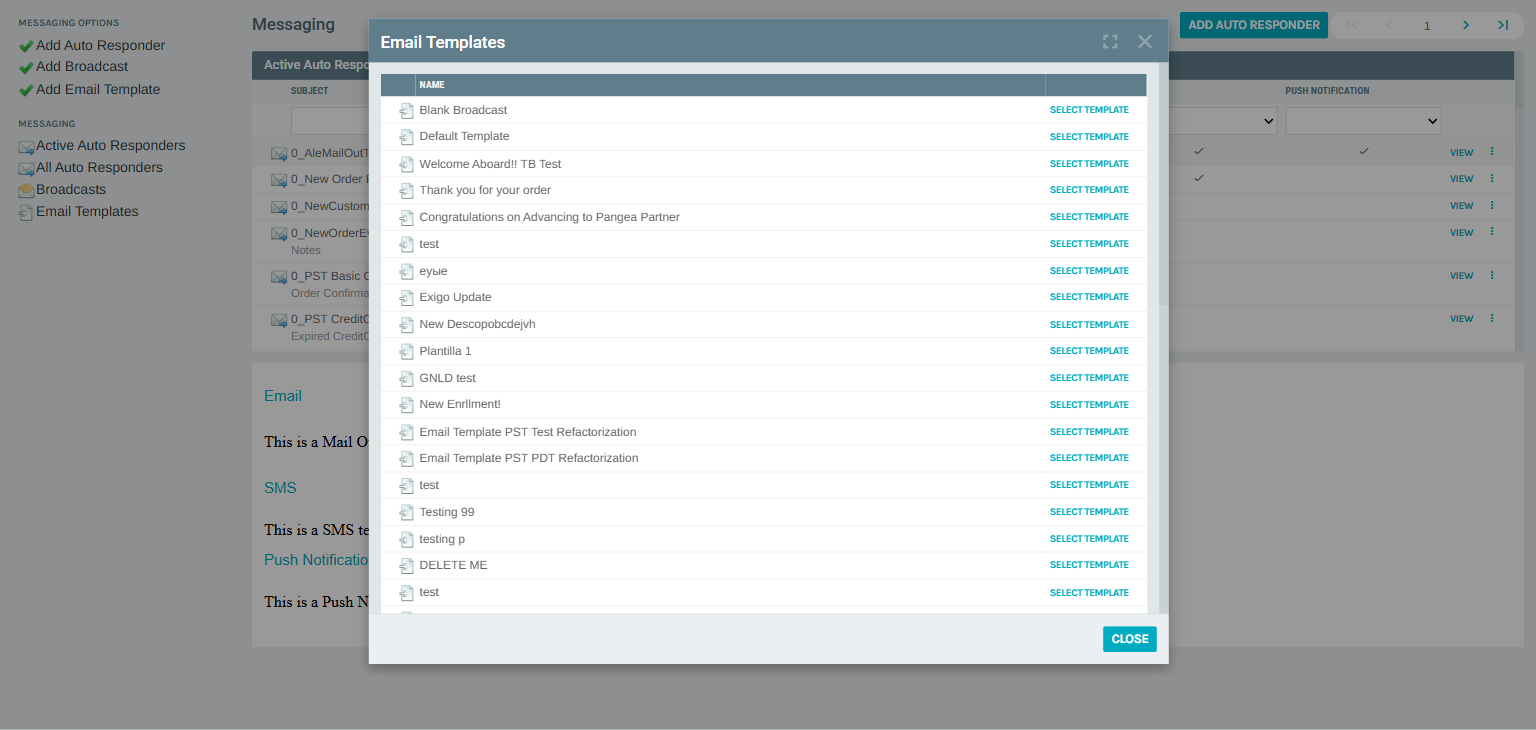
Click ADD AUTO RESPONDER to begin. A template selection dialog appears — select Blank Broadcast to start from scratch, or choose an existing template to pre-populate the form.
Editing an Auto Responder
From the All Auto Responders list, click VIEW on any row to select it, then click the ⋮ (more) menu and choose Edit to open the full Broadcast Message editor.
The editor has two tabs: Message and Send Properties.
Message Tab
The Message tab contains three channel sections that can each be enabled or disabled independently.
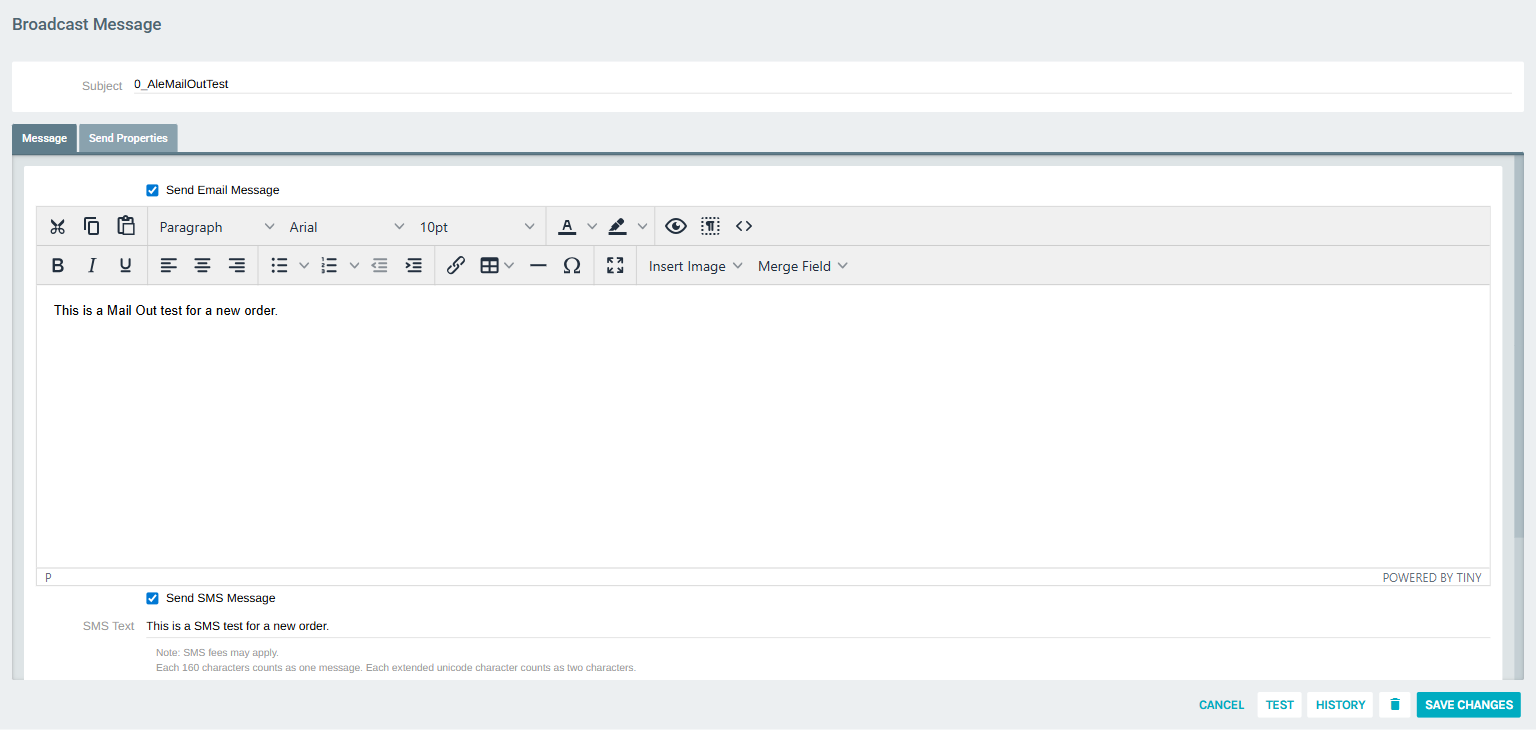
Push Notification Section
Scroll to the bottom of the Message tab to find the Push Notification section.
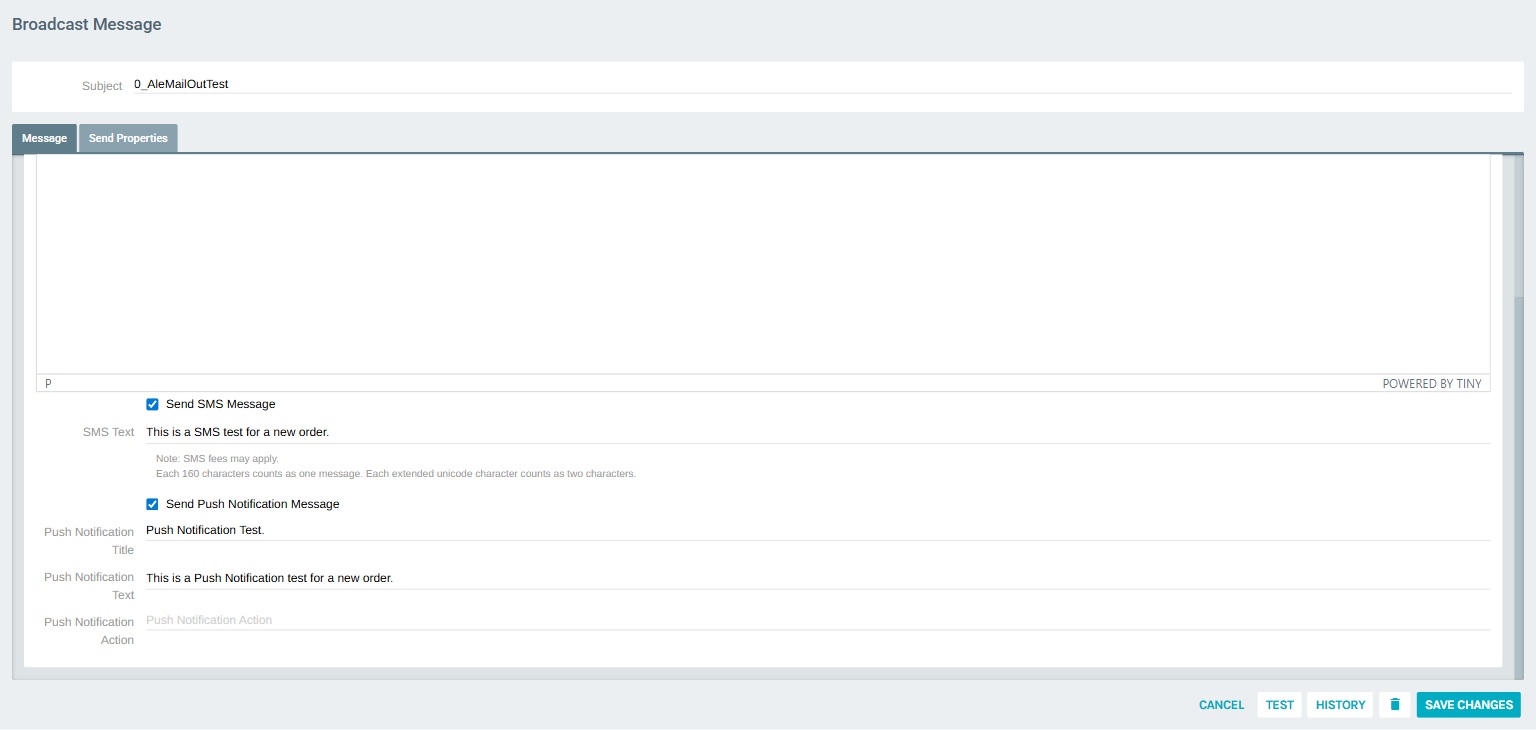
| Field | Description |
|---|---|
| Send Push Notification Message | Enable or disable push notification delivery for this message |
| Push Notification Title | Short headline shown at the top of the notification |
| Push Notification Text | The body of the push notification |
| Push Notification Action | Optional URL or deep link that opens when the recipient taps the notification |
Send Properties Tab
The Send Properties tab configures sender identity, SMS delivery options, event triggers, and message targeting.
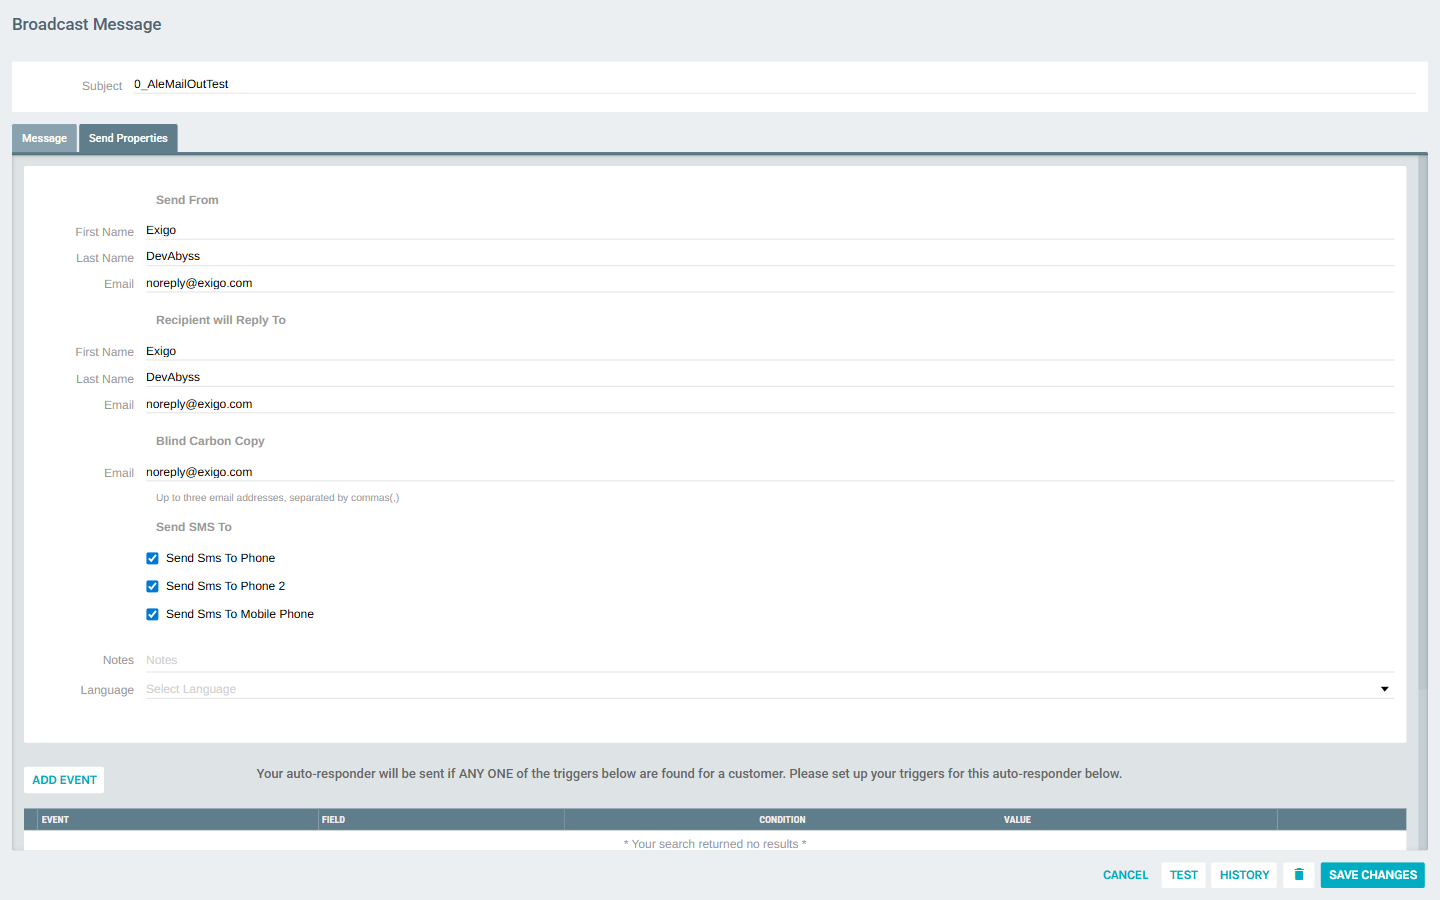
Sender Configuration
| Field | Description |
|---|---|
| Send From – First Name | Sender first name shown on outgoing emails |
| Send From – Last Name | Sender last name |
| Send From – Email | The From address for outgoing emails |
| Recipient will Reply To – First Name | Reply-To first name |
| Recipient will Reply To – Last Name | Reply-To last name |
| Recipient will Reply To – Email | Reply-To email address |
| Blind Carbon Copy | Up to three BCC email addresses (comma-separated) |
| Send SMS To | Select which customer phone fields to use: Phone, Phone 2, and/or Mobile Phone |
| Notes | Internal notes for this auto responder (not sent to recipients) |
| Language | Filter sends to customers in a specific language |
Event Triggers
The right column of the Send Properties tab controls when this auto responder fires. The message will be sent if any one of the configured triggers is matched.
Click ADD EVENT to configure a trigger.
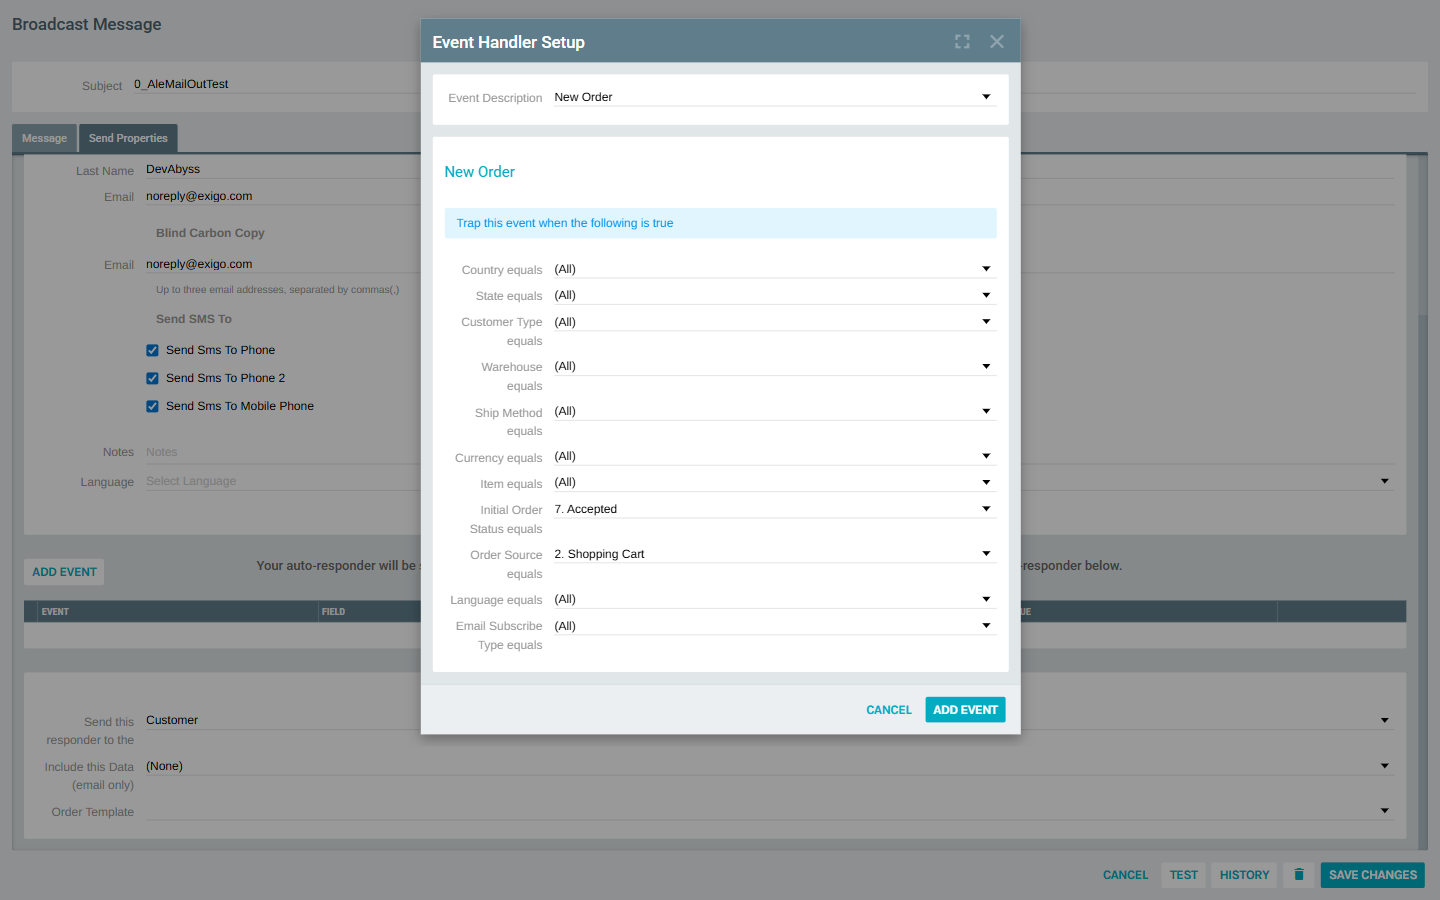
Use the Event Description dropdown to choose the type of event that will fire the auto responder.
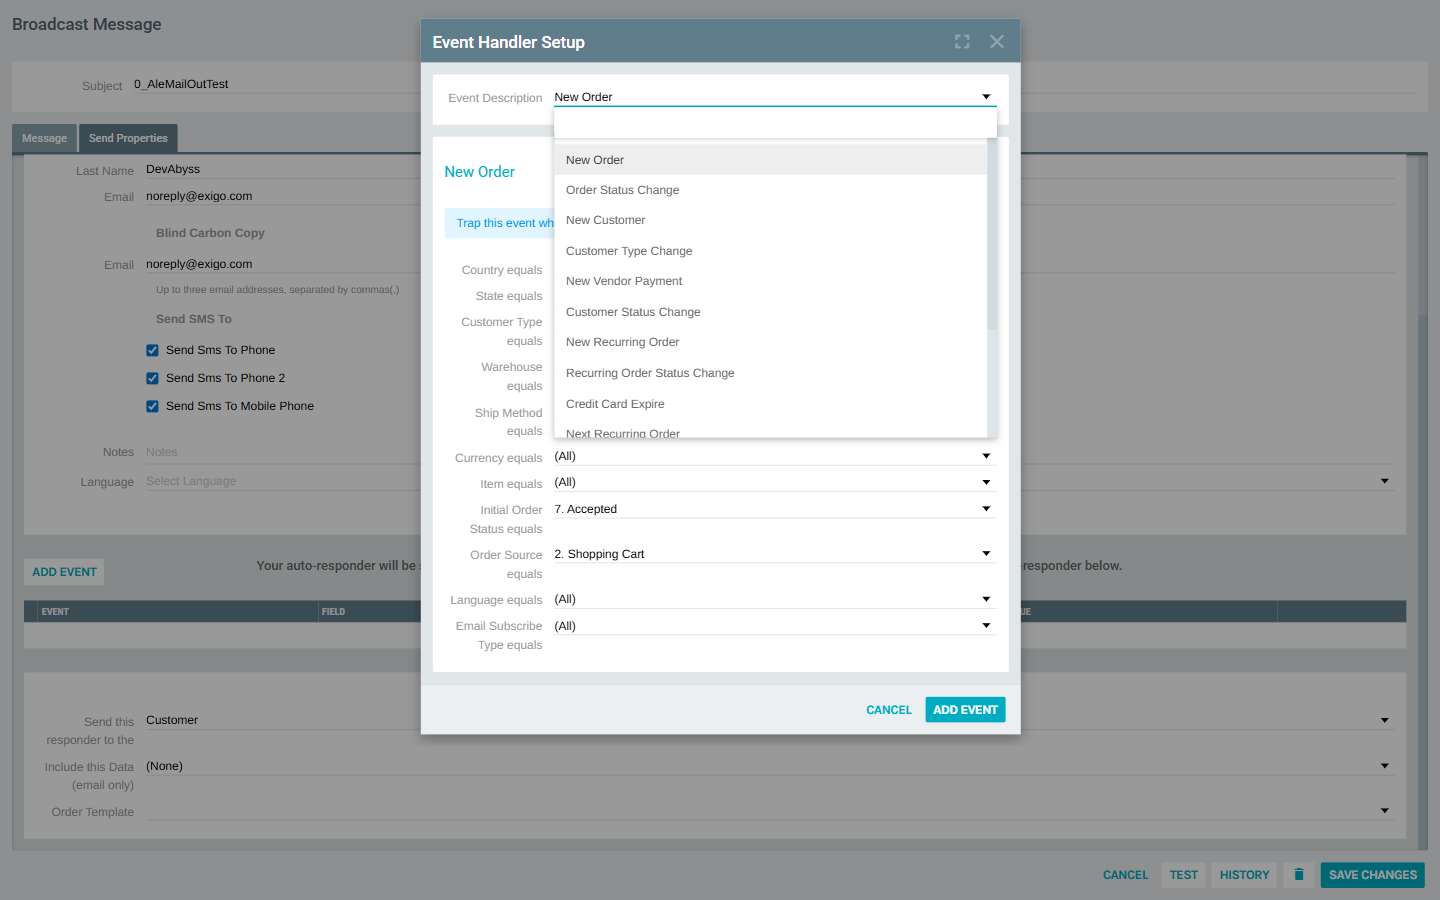
Available Event Types:
| Event | Description |
|---|---|
| New Order | Fires when a new order is placed |
| Order Status Change | Fires when an order's status changes |
| New Customer | Fires when a new customer account is created |
| Customer Type Change | Fires when a customer's type is changed |
| New Vendor Payment | Fires on a new vendor payment |
| Customer Status Change | Fires when a customer's status is changed |
| New Recurring Order | Fires when a new recurring order is created |
| Recurring Order Status Change | Fires when a recurring order's status changes |
| Credit Card Expire | Fires when a stored credit card is nearing expiration |
| Next Recurring Order | Fires before the next scheduled recurring order date |
Each event type exposes its own set of filter conditions (Country, State, Customer Type, Warehouse, Ship Method, etc.) to narrow down which customers the trigger applies to. Setting a filter to (All) means the condition is not restricted.
Additional Targeting Options
| Field | Description |
|---|---|
| Send this responder to the | Choose whether to send to the Customer or another associated party |
| Include this Data (email only) | Attach a related data set to the email body |
| Order Template | Select a specific order template to associate with this responder |
Broadcasts with Push Notifications
One-time Broadcasts also support the Push Notification channel. The Broadcasts list shows the same Email, SMS, and Push Notification columns as the Auto Responders list.
Click ADD BROADCAST from the Messaging sidebar to create a new broadcast. The editor is identical to the Auto Responder editor's Message tab, with the same Push Notification Title, Text, and Action fields. Broadcasts do not have event triggers — they are sent manually or scheduled.
Testing a Message
From the auto responder or broadcast editor, click the TEST button in the toolbar to send a test message. You will be prompted to specify a recipient for the test send across all enabled channels, including push notification.
Tips
- Push Notification can be enabled alongside Email and/or SMS, or used as the only channel.
- Use the Push Notification Action field to deep-link recipients to a specific screen in your mobile app when they tap the notification.
- Event triggers support multiple conditions simultaneously — use these to scope notifications precisely (e.g., only for a specific Customer Type in a particular Country).
- The Active Auto Responders view in the portal shows only enabled responders; use All Auto Responders to see the full list, including disabled ones.
- The Push Notification column filter in the list view lets you quickly filter to show only messages that have push notification enabled.