Customer Portal Management
See the sections below for configuration steps in the Exigo Portal.
Exigo User Manual: Customer Maintenance

Viewing and Editing an Individual Order ........................................................................................................................ 22
Printing an Invoice .......................................................................................................................................................... 22
View Detail Report .......................................................................................................................................................... 22
Emailing an Invoice ......................................................................................................................................................... 22
Moving an Order ............................................................................................................................................................. 23
View Order Change History ............................................................................................................................................ 23
Adding a Recurring Order ................................................................................................................................................... 23
RECURRING ORDER WINDOW'SHIP TO TAB................................................................................................................. 23
RECURRING ORDER WINDOW'ITEMS TAB ................................................................................................................... 23
RECURRING ORDER WINDOW'SHIP METHOD TAB ...................................................................................................... 24
RECURRING ORDER WINDOW'SCHEDULE TAB ............................................................................................................ 24
RECURRING ORDER WINDOW'PAYMENT TAB ............................................................................................................. 24
RECURRING ORDER'INVOICE WINDOW ....................................................................................................................... 24
Viewing and Editing an Individual Recurring Order ............................................................................................................ 25
Recurring Order Section ................................................................................................................................................. 25
PRINTING A RECURRING ORDER INVOICE ....................................................................................................................... 25
CREATING AN ORDER FROM A RECURRING ORDER ....................................................................................................... 25
Create Order ............................................................................................................................................................... 25
DELETE RECURRING ORDER ............................................................................................................................................ 25
Delete Recurring Order ............................................................................................................................................... 25
VIEW RECURRING ORDER CHANGE HISTORY .................................................................................................................. 25
History ......................................................................................................................................................................... 25
ORDERS AND INVOICES ................................................................................................................................................... 26
Viewing Customer Contacts ................................................................................................................................................ 27
ADDING A NEW CONTACT .............................................................................................................................................. 27
EDITING A CONTACT ....................................................................................................................................................... 27
DELETING A CONTACT .................................................................................................................................................... 27
Viewing Customer Documents ........................................................................................................................................... 27
UPLOADING A DOCUMENT ............................................................................................................................................. 27
Viewing Customer History .................................................................................................................................................. 28
Customer History ............................................................................................................................................................ 28
Customer Details Toolbar ............................................................................................................................................... 28
Entering Inquiries ................................................................................................................................................................ 28
VIEWING INQUIRIES FROM CUSTOMER DETAILS ........................................................................................................... 28
Exigo User Manual: Customer Maintenance

My Actions .......................................................................................................................................................................... 29
DEFINING REPORT CRITERIA ........................................................................................................................................... 29
Viewing Payment History .................................................................................................................................................... 29
Viewing Customer Enroller Tree ......................................................................................................................................... 29
NAVIGATION UP THE TREE.............................................................................................................................................. 30
PERFORMING A TREE MOVE ........................................................................................................................................... 30
NAVIGATE THROUGH THE TREE ...................................................................................................................................... 31
Viewing Customer Unilevel Tree ........................................................................................................................................ 32
NAVIGATION UP THE TREE.............................................................................................................................................. 33
PERFORMING A TREE MOVE ........................................................................................................................................... 33
NAVIGATE THROUGH THE TREE ...................................................................................................................................... 34
Viewing Customer Binary Tree ........................................................................................................................................... 34
NAVIGATION UP THE TREE.............................................................................................................................................. 35
PERFORMING A TREE MOVE ........................................................................................................................................... 35
NAVIGATE THROUGH THE TREE ...................................................................................................................................... 35
Expand or Collapse Tree ............................................................................................................................................. 35
Viewing Customer Binary Grid ............................................................................................................................................ 36
NAVIGATION UP THE TREE.............................................................................................................................................. 36
PERFORMING A TREE MOVE ........................................................................................................................................... 36
NAVIGATE THROUGH THE TREE ...................................................................................................................................... 36
-
Click on Customer ID Number ................................................................................................................................ 36
-
Click on Customer Name ........................................................................................................................................ 36
Report Builder ..................................................................................................................................................................... 36
Report Builder Documentation ........................................................................................................................................... 37
CREATE NEW REPORT ..................................................................................................................................................... 37
REPORT FIELDS ................................................................................................................................................................ 37
Adding a Report Field ................................................................................................................................................. 37
Removing a Report Field ............................................................................................................................................. 37
Editing a Report Field .................................................................................................................................................. 37
Moving a Report Field Up ........................................................................................................................................... 37
Moving a Report Field Down ...................................................................................................................................... 38
REPORT FILTERS .............................................................................................................................................................. 38
Adding a Report Filter ................................................................................................................................................. 38
Removing a Report Filter ............................................................................................................................................ 38
Exigo User Manual: Customer Maintenance

Editing a Report Filter ................................................................................................................................................. 38
Moving a Report Filter Up........................................................................................................................................... 38
Moving a Report Filter Down ...................................................................................................................................... 38
REPORT SORT ORDER ...................................................................................................................................................... 39
Adding a Report Sort Order ........................................................................................................................................ 39
Removing a Report Sort Order.................................................................................................................................... 39
Editing a Report Sort Order ........................................................................................................................................ 39
Moving a Report Sort Order Up .................................................................................................................................. 39
Moving a Report Sort Order Down ............................................................................................................................. 39
REPORT OPTIONS TAB .................................................................................................................................................... 40
SHARING A REPORT ........................................................................................................................................................ 40
CREATING THE FINISHED REPORT ................................................................................................................................... 40
COPY EXISTING REPORT .................................................................................................................................................. 40
IMPORT REPORTS, SHARED, AND TEMPLATES ............................................................................................................... 40
EXPORTING DATA FROM A REPORT ................................................................................................................................ 41
REMOVING A REPORT ..................................................................................................................................................... 41
Customer Management
Exigo User Manual: Customer Maintenance

Exigo Admin enables you to quickly add, view, edit, and delete customer records and their corresponding orders.
You may access customer records from multiple locations in Exigo Admin, such as the Today page or the Customer
menu.
Note: Each function and section of Exigo requires security access. Only users with access to the menu will be able to
see its functions.
Adding a New Customer
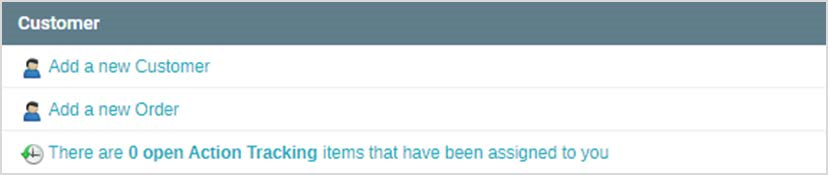
You may add a new customer from the Today, Customer Search, or Customer Details pages.
- While on the Today screen, click on Add a New Customer in the left column.
-While on the Customer Search or Customer Details page, click on New Customer in the upper right.
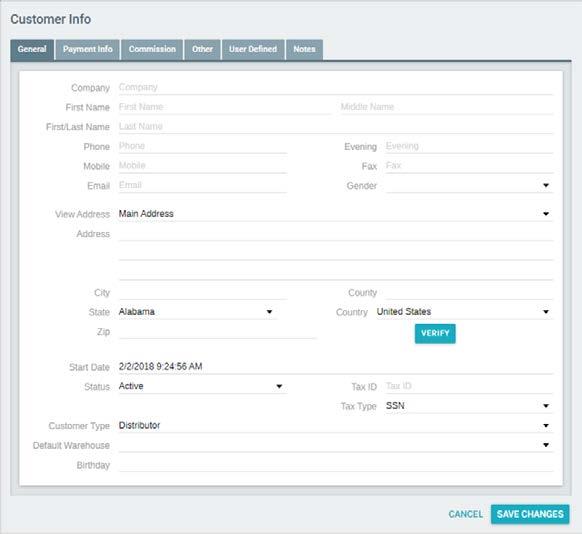
ADD CUSTOMER WINDOW - General tab
When the Add Customer window first appears, the General tab will be open.

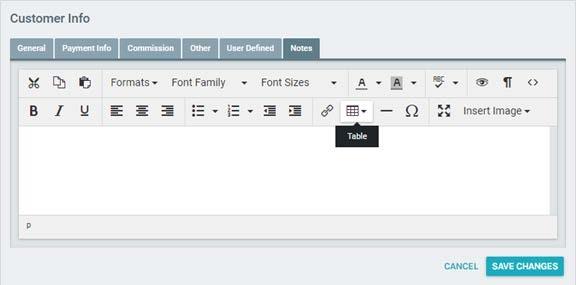
ADD CUSTOMER WINDOW - NOTES TAB
Exigo User Manual: Customer Maintenance

-
In the General tab, enter the customer's contact information.
-
You may verify the zip code by clicking on the button. Note: Clients may designate required fields in the
Administration section.
- Enter the customer information for the remaining tabs, shown on the following pages, and click OK to save
the customer information. Note: You may edit customer information once it is saved.
-
In the Add Customer window, click on the Notes tab.
-
Enter the notes for the new customer.
-
Once the customer information is saved, the notes will appear in the Customer Details page.
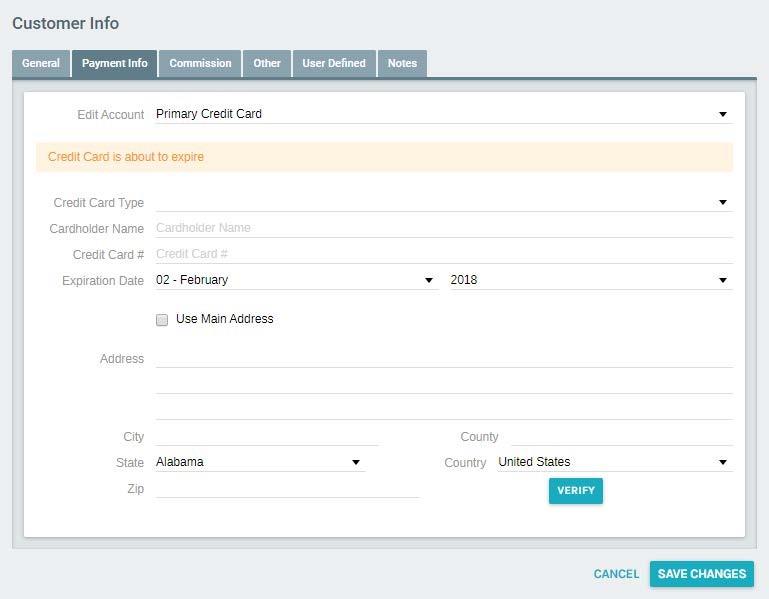
ADD CUSTOMER WINDOW - PAYMENT INFO TAB
- Enter payment information for automatic billing and payment. In the Add Customer window, click on the
Payment Info tab.

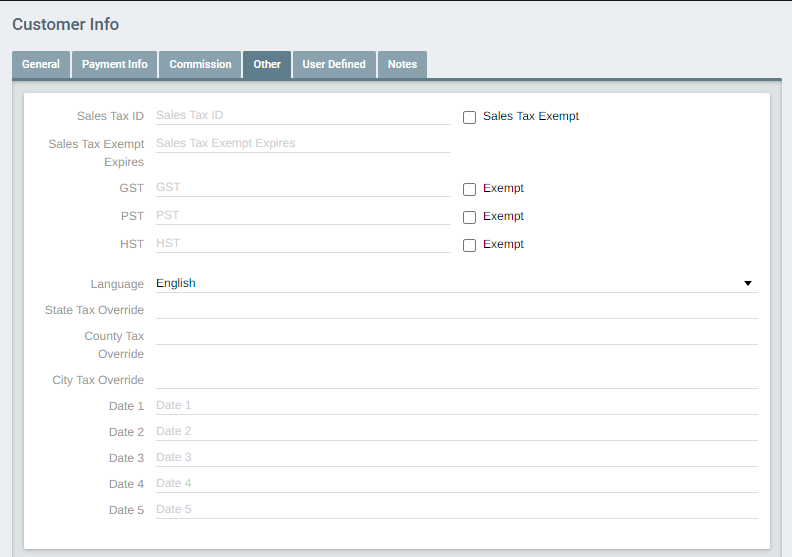
ADD CUSTOMER WINDOW - OTHER TAB
Exigo User Manual: Customer Maintenance

-
You may enter the sales tax ID, and its expiring date.
-
You may use the GST, PST and HST fields to denote sales exempt certificates for Canada.
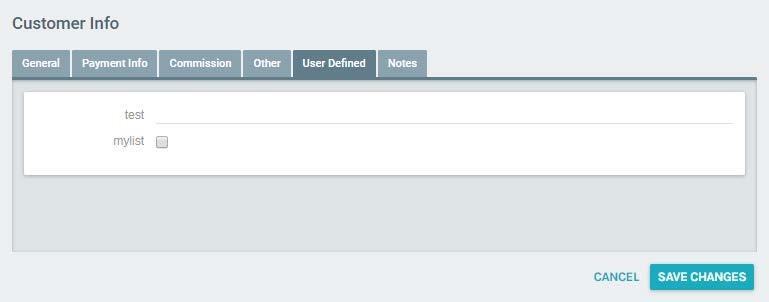
ADD CUSTOMER WINDOW - USER DEFINED FIELDS TAB
-
In the Add Customer Window, click on the User-Defined Fields tab.
-
You may define criteria unique to your individual company in Administration.


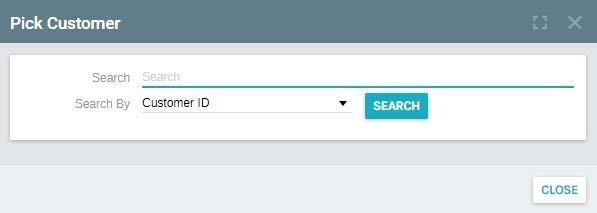
Searching for an Existing Customer
Exigo User Manual: Customer Maintenance

You may search for an existing customer from the Customer Search page.
-
On the top right User Menu, select Search.
-
Select the field to search by and enter a value.
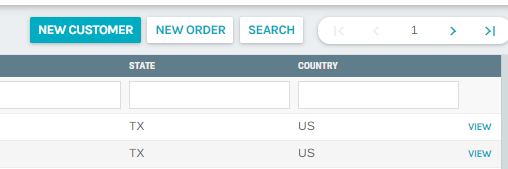
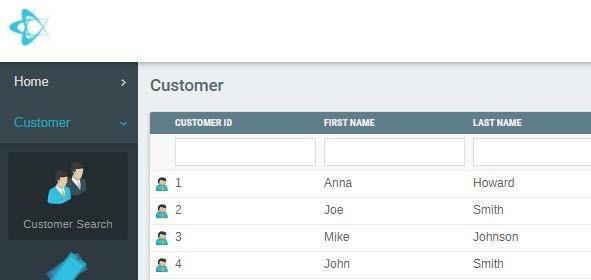
CUSTOMER SEARCH PAGE
- The Customer Search page will appear with all the existing customers listed.


Viewing Customer Information
Exigo User Manual: Customer Maintenance

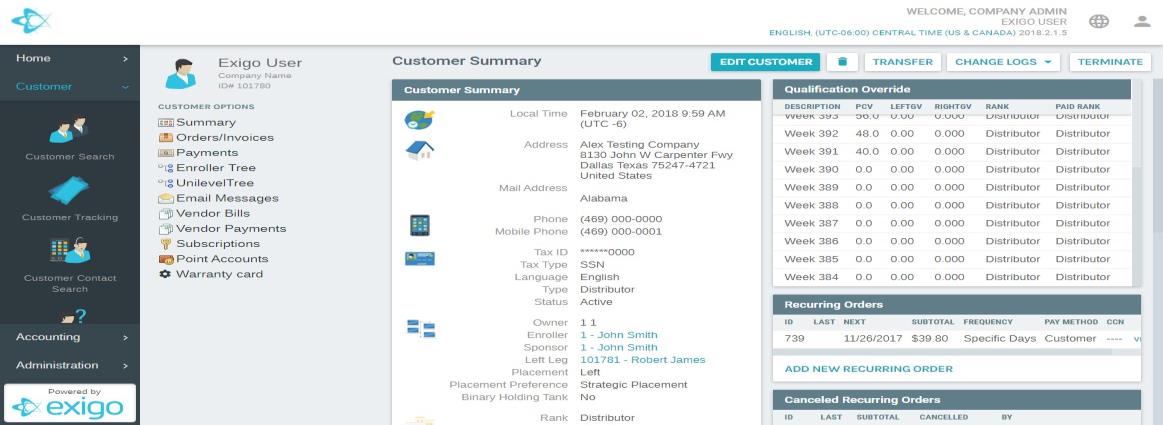
You may view the customer details by selecting a customer in the Customer Search page. The Customer Details
page will appear.
CUSTOMER DETAILS PAGE
- You may edit the customer information as described on the following pages.
Viewing and Editing Customer Details
The contact and user-definable fields can be edited by clicking on Edit Customer in the Customer Information page.
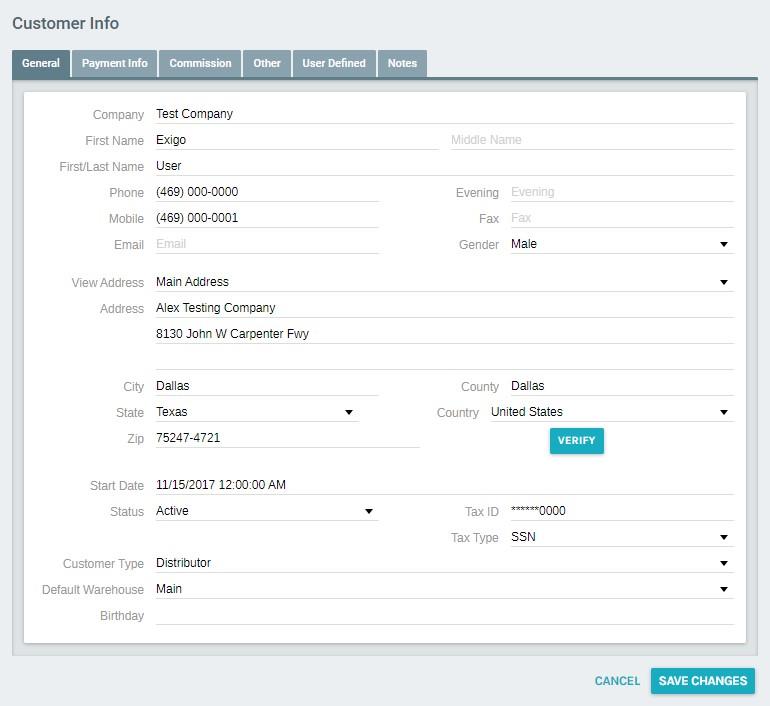
EDIT CUSTOMER WINDOW
-
The Edit Customer window will appear for you to make your changes.
-
The Edit Customer window contains the same tabs and information as the Add New Customer window.


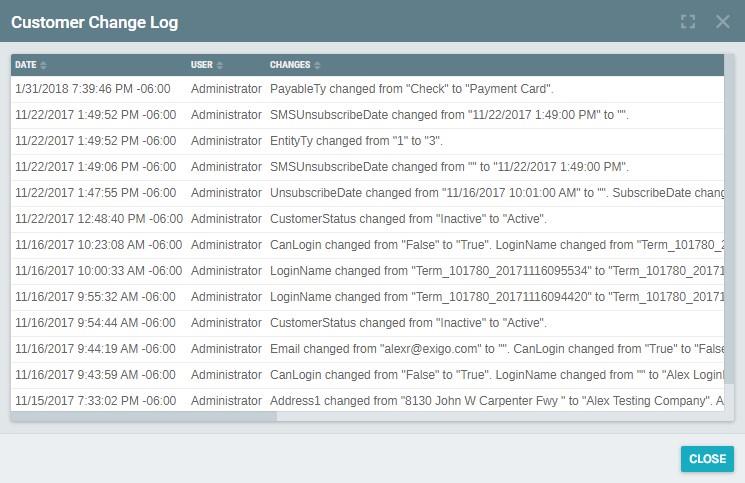
Viewing Customer Change Log
Exigo User Manual: Customer Maintenance

-
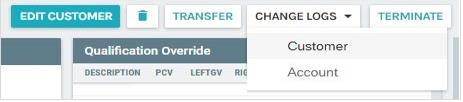
View the Customer Change Log by clicking on Change Logs in the Customer Summary page.
-
The Customer Change Log window contains a history of changes made to different users.


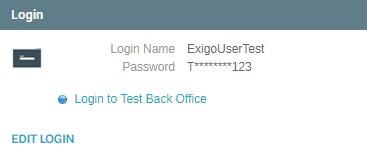
Viewing and Editing Customer Login Access
Exigo User Manual: Customer Maintenance

The login access for a customer can be changed by clicking on Edit Login in the Customer Details page.
EDIT LOGIN WINDOW'LOGIN TAB
-
Select if you want the customer to login.
-
Select the Login Profile for the customer. These are defined in the Administration section.
-
Enter the login name.
-
Enter the password.
Note: If you use a mail client other than Exigo, it may take up to an hour for the password changes to take effect.
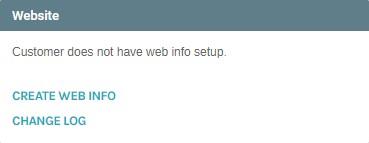
Viewing and Editing the Customer's Web Alias
The customer's web alias, or user name appears throughout Exigo Office as well as in the Contacts.
The web alias and welcome greeting in the top right window of Exigo Office can be changed by clicking on Modify
Web Info in the Customer Details page.


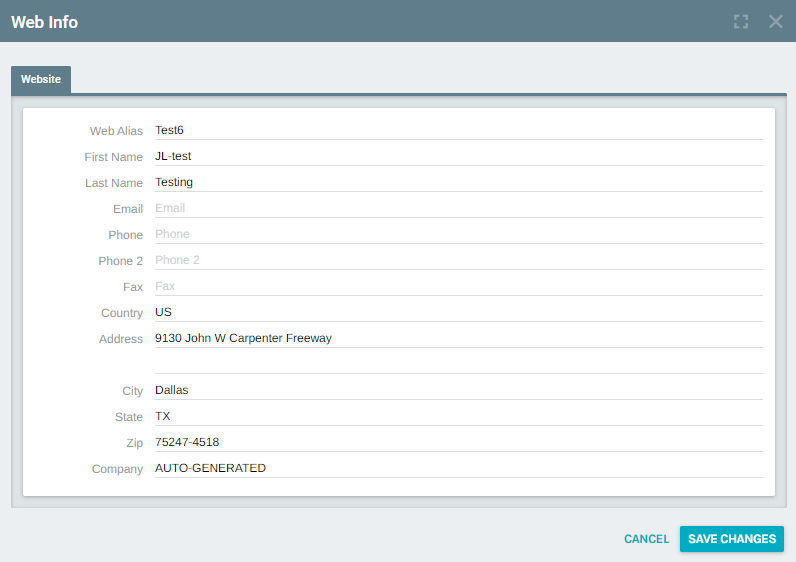
WEB INFO WINDOW
Exigo User Manual: Customer Maintenance

The Web Settings window will appear for you to make your changes to:
-
Web Alias: the name identifying the user for online chats and emails.
-
First and Last Name: the user's first and last names
-
Contact Information
Viewing and Editing Customer Notes
You may edit the customer notes from the Customer Details page or the Edit Customer window.
CUSTOMER DETAILS
- Click on the Edit Notes button in the Customer Details page.


At a Glance:
Exigo User Manual: Customer Maintenance

EDITING CUSTOMER INFORMATION
The table below quickly outlines how to change specific customer information.
If you want to edit...
Address
Birthday
Checking Account
Information
Company Name
Company Owner
Credit Card Information
Currency
Customer Gender
Go to...
Name/Address tab in the Edit Customer Window through the Customer Details page
Other tab in the Edit Customer Window through the Customer Details page
Payment Info tab in the Edit Customer Window through the Customer Details page
Name/Address tab in the Edit Customer Window through the Customer Details page
Other tab in the Edit Customer Window through the Customer Details page
Payment Info tab in the Edit Customer Window through the Customer Details page
Other tab in the Edit Customer Window through the Customer Details page
Name/Address tab in the Edit Customer Window through the Customer Details page
Customer Notes
Customer Status
Customer Title
Customer Type
Demographic Information
Email Address
Email Group
Fax Number
Login Access
Mail Broadcast Group
If you want to edit...
Mailing Address
Name
Payment Information
Phone Number
Social Security Number
Tax Exempt
Tax Status
User-Defined Fields
Web Alias
Welcome Greeting
Notes tab in the Edit Customer Window through the Customer Details page OR
Click on Modify Notes under the Notes section in the Customer Details page
Other tab in the Edit Customer Window through the Customer Details page.
Name/Address tab in the Edit Customer Window through the Customer Details page
Other tab in the Edit Customer Window through the Customer Details page
Name/Address tab in the Edit Customer Window through the Customer Details page
Name/Address tab in the Edit Customer Window through the Customer Details page
Email Groups tab in the Edit Customer Window through the Customer Details page
Name/Address tab in the Edit Customer Window through the Customer Details page
Customer Login section in the Customer Details page
Email Groups tab in the Edit Customer Window through the Customer Details page
Go to...
Name/Address tab in the Edit Customer Window through the Customer Details page
Name/Address tab in the Edit Customer Window through the Customer Details page
Payment Info tab in the Edit Customer Window through the Customer Details page
Name/Address tab in the Edit Customer Window through the Customer Details page
Other tab in the Edit Customer Window through the Customer Details page
Other tab in the Edit Customer Window through the Customer Details page
Other tab in the Edit Customer Window through the Customer Details page
User Defined Fields tab in the Edit Customer Window through the Customer Details page
Web Info section in the Customer Details page
Web Info section in the Customer Details page
Adding an Order
Exigo User Manual: Customer Maintenance

You may enter an order for a customer from the Customer Details page.
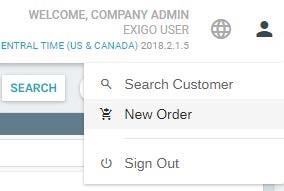
USER MENU
You may place a new order from the User Menu, Customer Search, Customer Summary or Order/Invoices pages.
User Menu
- On the top right User Menu, select New Order.
Customer Search
-
From the Customer Search page, click New Order on the top navigation.
-
Click on the New Order button.
-
The Order window will appear.
Orders/Invoices
- From the Order/Invoices page, click the Add Order button on the top navigation.
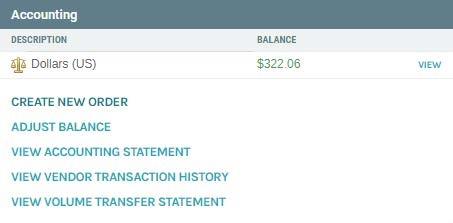
Customer Summary
- From the Accounting section, Click on Create a New Order.


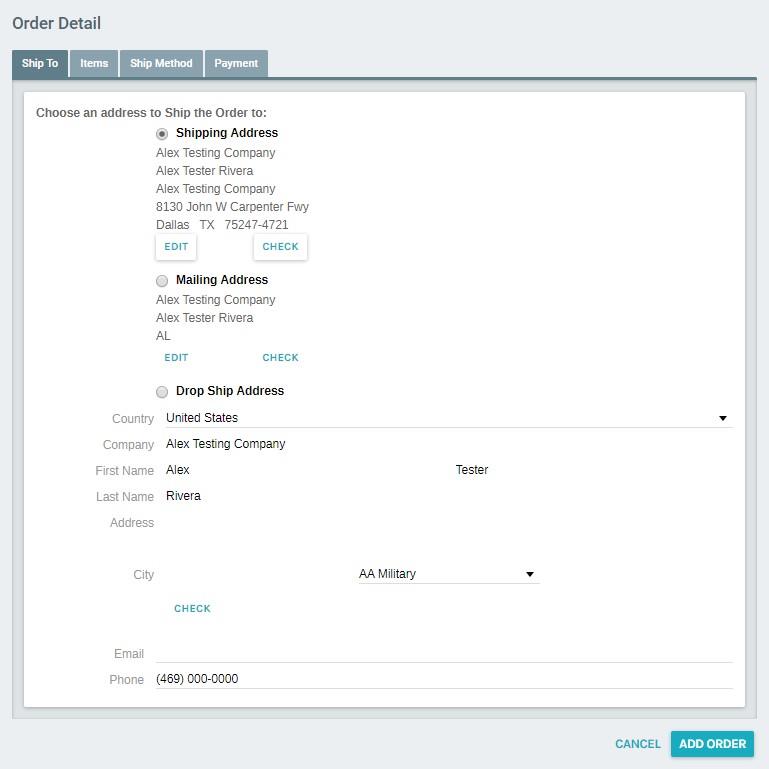
ORDER WINDOW - SHIP TO TAB
Exigo User Manual: Customer Maintenance

The Order window will appear with the Ship To tab open. Enter the information in the Ship To tab as well as the
other tabs to complete the order. Once the order is saved, it will appear in the Order History list.


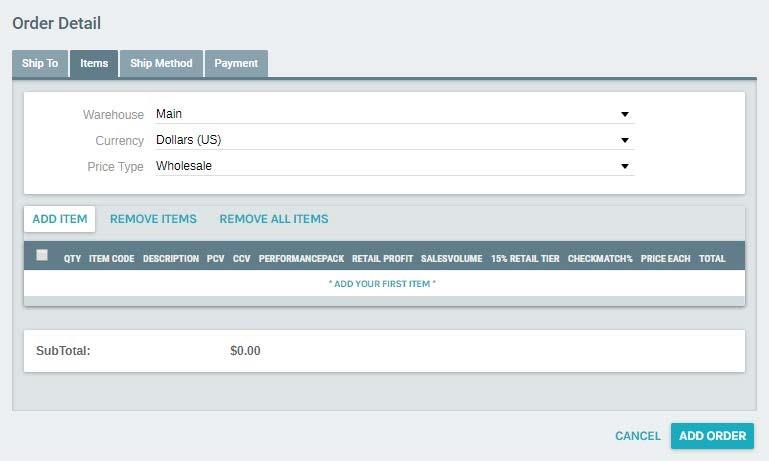
ORDER WINDOW - ITEMS TAB
Exigo User Manual: Customer Maintenance

- Select the shipping address for the order from: - The customer's shipping address as entered in the Customer Details Add/Edit Customer window'Name and Address tab. - The customer's mailing address as entered in the Customer Details Add/Edit Customer window'Name and Address tab. - A new mailing address.
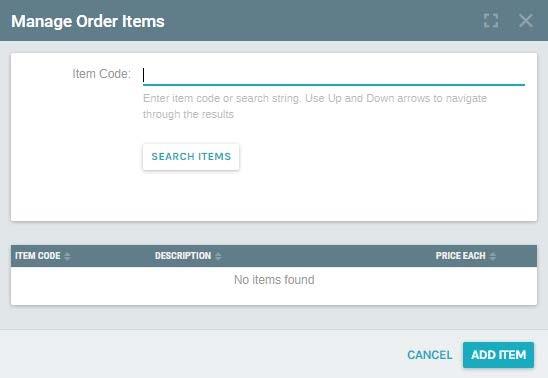
- Enter the email address and phone number. The Items tab will not have any items selected when it first appears. 1. The default warehouse will appear. If you need to change the warehouse, and have access to do so, click on the arrow next to warehouse to select another warehouse. 2. The customer's default currency will appear, as entered in the Customer Details'Other tab. You may change the customer currency by clicking on the arrow next to currency. 3. Click on the Add Item button to add an item to the order. The Order Item window will appear.


ORDER WINDOW - SHIP METHOD TAB
Exigo User Manual: Customer Maintenance

-
Enter the item code. And Click Search.
-
The product description assigned to the code will appear.
-
You may change the product description.
-
Enter the quantity to be purchased.
-
The item price will appear when the item code is entered. You may change the price by checking the box
next to Override Price.
-
The total (quantity) (item price) will automatically appear.
-
Click Save Changes to close the window and add the item to the order.
-
Continue adding items to the order.
-
You may remove an unwanted item by selecting it and clicking on the Remove Items.
-
You may edit an item by selecting it and clicking on the Edit button.
-
The Order Item window shown on the previous page will appear.
-
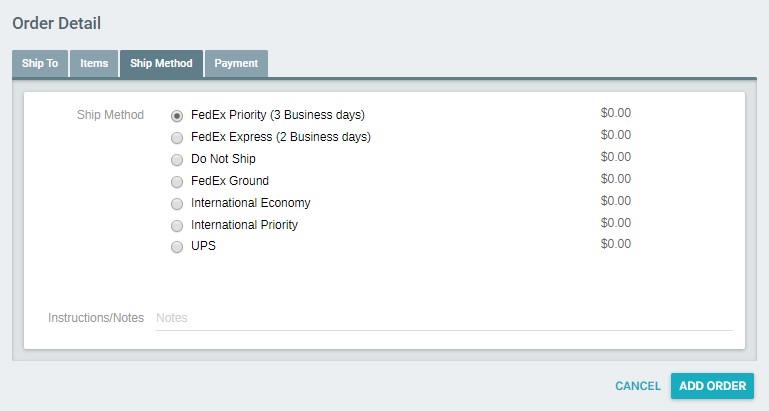
Select the shipping method for the order.
Note: The shipping methods are entered in Administration.
-
Select the shipping method that will be used.
-
If you have any special handling instructions to be printed on the invoice or packing slip, you may enter them
in Instructions/Notes.

ORDER WINDOW ' PAYMENT TAB
Exigo User Manual: Customer Maintenance

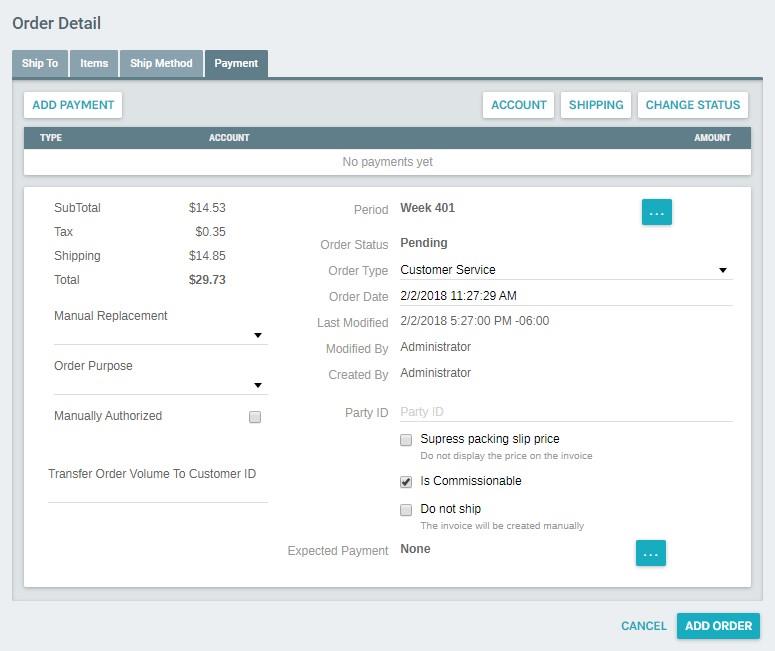
ORDER WINDOW'PAYMENT TAB
Note: You may select from multiple forms of payment.
-
Click on the Add Payment button to add payment.
-
The Add Payment window will appear.

Add Payment Window
Exigo User Manual: Customer Maintenance

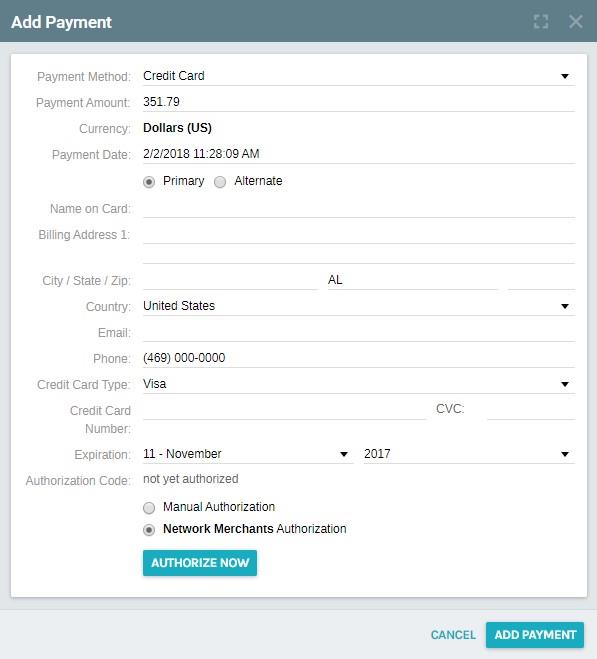
- The payment information will appear as it was entered in the Customer Details Window- Payment Info
tab.
-
You may enter a manual authorization, or run an authorization through a gateway.
-
Click on the Authorize Now button to authorize payment and add the payment to the order history.
-
Click OK to close the Add Payment window and return to the Order'Payment Tab.
-
In the Order Window'Payment Tab, shown above, you may remove a payment by selecting it and clicking on
the Remove button.
- You may edit a payment entry by selecting it and clicking on the Edit button. The Payment window shown on
the previous page will appear for you to make your change.
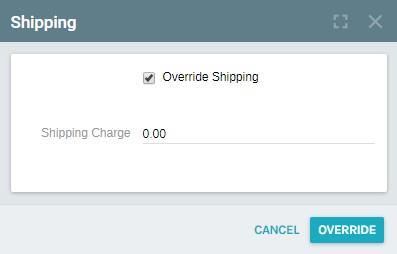
- You may override the calculated shipping price by clicking on the Shipping button.

CHANGE ORDER STATUS WINDOW
Exigo User Manual: Customer Maintenance

-
The Override Shipping window will appear.
-
The Override Shipping flag will already be activated.
-
Enter the new total.
-
Click OK to save the changes and return to the Order' Payment tab.
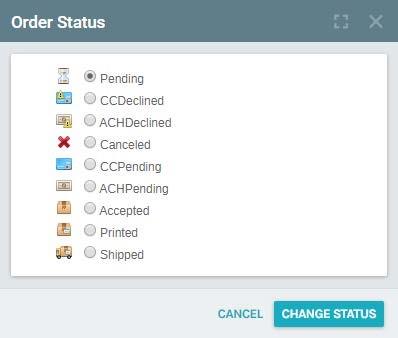
-
You may change the order status by clicking on the Change Order Status button.
-
The Change Order Status window will appear.
-
Select the order's status.
-
Click OK to save the changes and return to the Order'Payment tab.
-
You may change the order date by clicking on the Browse button next to it. The Date and Time window will
appear.
-
You may exclude the invoice from being shipped (for gifts) by clicking on the Suppress Pack Slip Price flag.
-
If you want to exclude the invoice from being printed in a batch print job, click on the Do Not Ship- invoice
created manually flag.
- When all of the order information has been entered in the Order window, click on the Add Order button at the
bottom.
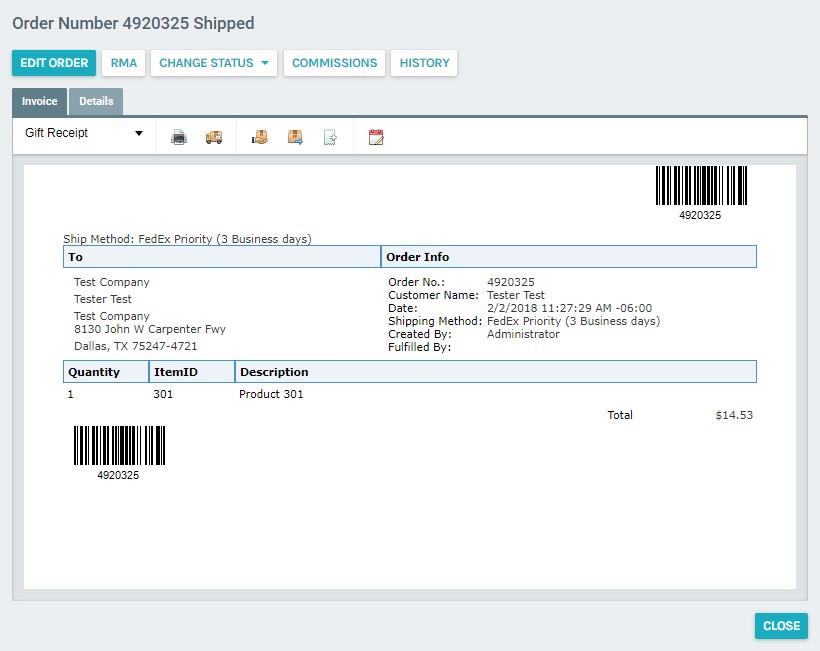
- The Order Invoice window will appear.


Exigo User Manual: Customer Maintenance

-
A formatted invoice for the saved order will appear.
-
You may access the following functions in Order Invoice window by clicking on its button.
-
Print -You may print the invoice.
-
Edit Order -You may edit the order. This will reopen the Order window and tabs.
-
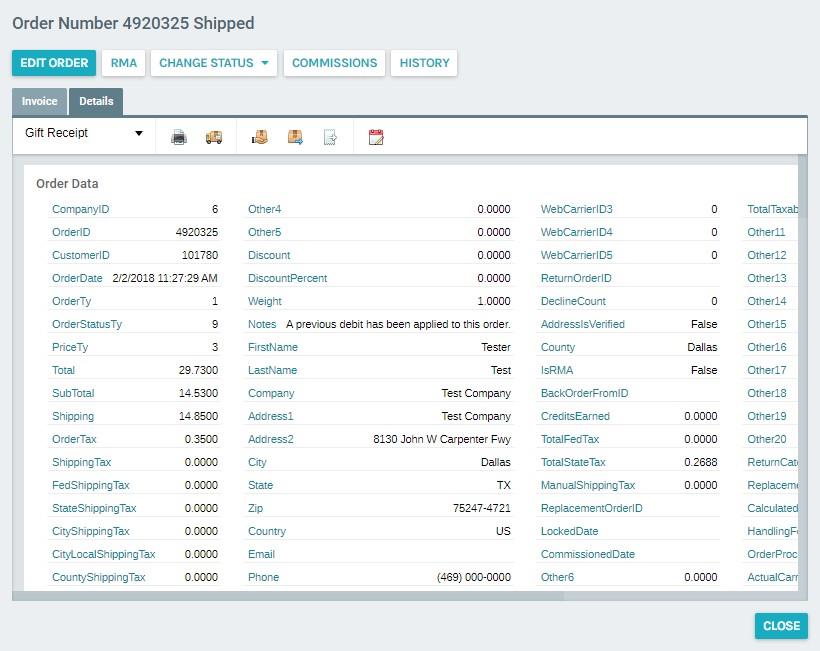
Details -You may view a detailed report of the invoice.


Viewing Order History
Exigo User Manual: Customer Maintenance

You may view order history for a customer from the Customer Details page.
- Click on Orders/Invoice in the Customer Options Menu
Note: The menu name changes depending upon the last function used. For example, if you viewed contacts last, the
Contacts name would appear as the menu name.
- The order history will appear. Viewing and Editing an Individual Order You may view and edit an individual order for a customer from the Customer Details page. 1. From the order history page in the previous section, click on the order you wish to view or edit 2. The Order Invoice window will appear. 3. Click on the Edit Order button in the Invoice Window. 4. Make your changes when the Order window will appear. Printing an Invoice You may print an invoice for an individual order for a customer from the Customer Details page. 1. From the order history page in the previous section, click on the order you wish to print. 2. The Order Invoice window will appear. 3. Click on the Print button. View Detail Report You may view a detail report for an individual order for a customer from the Customer Details page. 1. From the order history page in the previous section, click on the order you wish to view or edit 2. The Order Invoice window will appear. 3. Click on the Details Tab Emailing an Invoice You may email an invoice for an individual order for a customer from the Customer Details page. 1. From the order history page in the previous section, click on the order you wish to email. 2. The Order Invoice window will appear. 3. Click on the EMAIL button. 4. The email window will appear, enter the recipient information, and send the email.
Moving an Order
Exigo User Manual: Customer Maintenance

You may move an order for an individual order for a customer from the Customer Details page.
-
From the order history page in the previous section, click on the order you wish to move.
-
The Order Invoice window will appear.
-
Click on the Move Order Button
-
The Move Order screen will open.
-
Click the three dots to open the search screen.
-
Choose where the order will be moved under and click Move
View Order Change History
You may view the order change history for an individual order for a customer from the Customer Details page.
-
From the order history page in the previous section, click on the order you wish to move.
-
The Order Invoice window will appear.
-
Click on the History Button
Adding a Recurring Order
You may enter a Recurring Order for a customer from the Customer Details page.
Recurring Order Section
- From the Customer Details page, Click on Add a New Recurring Order RECURRING ORDER WINDOW'SHIP TO TAB 1. The Recurring Order window will appear with the Ship To tab open. 2. Enter the information in the Ship To tab as well as the other tabs to complete the order. Once the order is saved, it will appear in the Recurring Order History list. 3. Select the shipping address for the order from: o The customer's shipping address as entered in the Customer Details Add/Edit Customer window' Name and Address tab. o The customer's mailing address as entered in the Customer Details Add/Edit Customer window' Name and Address tab. o A new mailing address. 4. Enter the email address and phone number. RECURRING ORDER WINDOW'ITEMS TAB 1. The Items tab will not have any items selected when it first appears. 2. The default warehouse will appear. If you need to change the warehouse, and have access to do so, click on the arrow next to warehouse to select another warehouse.
RECURRING ORDER WINDOW ' SHIP METHOD TAB
Exigo User Manual: Customer Maintenance

- The customer's default currency will appear, as entered in the Customer Details'Other tab. You may change
the customer currency by clicking on the arrow next to currency.
- Click on the Add Item button to add an item to the order. The Order Item window will appear.
o
Enter the item code and click search. The product description for that code will appear.
o
You may change the product description.
o
Enter the quantity to be purchased.
o
The item price will appear when the item code is entered. You may change the price by
checking the box next to Override Price.
o
The total (quantity) (item price) will automatically appear.
o
Click Add Item to close the window and add the item to the order.
-
Continue adding items to the order.
-
You may remove an unwanted item by selecting it and clicking on the Remove button.
-
You may edit an item by selecting it and clicking on the Edit button.
-
The Order Item window shown on the previous page will appear.
RECURRING ORDER WINDOW'SHIP METHOD TAB
- Select the shipping method for the order.
Note: The shipping methods are entered in Administration.
-
Select the shipping method that will be used.
-
If you have any special handling instructions to be printed on the invoice or packing slip, you may enter them
in Instructions/Notes.
RECURRING ORDER WINDOW'SCHEDULE TAB
-
The Recurring Order Schedule Tab allows you to set the frequency of the Recurring Orders.
-
Set the start date by clicking the date. Then click the start date and time in the calendar screen.
RECURRING ORDER WINDOW'PAYMENT TAB
-
The Recurring Order Payment Tab allows you to choose a selected payment method.
-
To choose the selected payment method, just click the circle next to the desired payment method.
-
The Recurring Order Payment Tab also allows you to edit customer information by clicking the Modify
Customer Account button.
RECURRING ORDER'INVOICE WINDOW
A formatted invoice for the saved order will appear.
-
Print -You may print the invoice.
-
Edit Recurring Order -You may edit the order. This will reopen the Order window and tabs.
Viewing and Editing an Individual Recurring Order
Exigo User Manual: Customer Maintenance

You may view or edit a Recurring Order for a customer from the Customer Details page.
Recurring Order Section
-
From the Customer Details page, Double-click on the Recurring Order number (ex: 10)
-
A formatted invoice for the saved order will appear.
PRINTING A RECURRING ORDER INVOICE
You may access the following functions in the Recurring Order Invoice window by clicking on its button.
Print
- You may print the invoice.
CREATING AN ORDER FROM A RECURRING ORDER
You may access the following functions in the Recurring Order Invoice window by clicking on its button.
Create Order
-
You may create an order by clicking the Create Order Button.
-
Click Create Order in the Confirm Screen. A new Recurring Order will be created.
DELETE RECURRING ORDER
You may access the following functions in the Recurring Order Invoice window by clicking on its button.
Delete Recurring Order
-
You may delete an order by clicking the "Red X"(Delete Recurring Order Button).
-
The system will ask again if the Recurring Order is to be deleted. You must place a check mark by clicking in the
box. Click Delete recurring order to confirm
- The Recurring Order will then be deleted.
VIEW RECURRING ORDER CHANGE HISTORY
You may access the following functions in the Recurring Order Invoice window by clicking on its button.
History
-
You may view the history of the recurring order changes by clicking the History Button.
-
This screen shows the dates and times in which changes were made to the Recurring orders.
At a Glance:
Exigo User Manual: Customer Maintenance

ORDERS AND INVOICES
Orders are entered for an individual customer through the Customer Details page.
The table below quickly outlines how to enter and edit different aspects of a customer's individual order.
If you want to add, ed
delete...
Check
Credit Card
Credit Card
Delivery Instructions
Item Description
Item Price
Item Quantity
Items
Serial Number
Shipping Address
Shipping Costs
Shipping Method
Tax Rate
Go to...
New Order/Edit Order, Payment Tab
New Order/Edit Order, Payment Tab
New Order/Edit Order, Payment Tab
New Order/Edit Order, Shipping Method Tab
New Order/Edit Order, Items Tab, Add Item Window
New Order/Edit Order, Items Tab, Add Item Window
New Order/Edit Order, Items Tab, Add Item Window
New Order/Edit Order, Items Tab, Add Item Window
New Order/Edit Order, Items Tab, Add Item Window
New Order/Edit Order, Ship To Tab
New Order/Edit Order, Payment Tab, Override Shipping Window
New Order/Edit Order, Shipping Method Tab
New Order/Edit Order, Payment Tab, Override Shipping Window
If you want to...
Accept payment for an in
invoice
Accept payment for multi
invoices
Email a statement of tran
history
Email an invoice
Fax a statement of transa
history
Fax an invoice
Print a statement of trans
history
Print an invoice
Go to...
Order History, Edit Order or Double-click Order Number
Accounting, Accept Payment
Order History, Edit Order or Double-click Order Number
Accounting, Accept Payment
Accounting, View Statement
Order History, Edit Order or Double-click Order Number
Accounting, View Statement
Order History, Edit Order or Double-click Order Number
Accounting, View Statement
Order History, Edit Order or Double-click Order Number
Viewing Customer Contacts
Exigo User Manual: Customer Maintenance

You may view, enter, edit, and delete contacts for a customer through the Customer Details page.
-
At the bottom of the Customer Options menu, click Customer Contacts
-
The list of Contacts will appear.
ADDING A NEW CONTACT
-
Click Add Customer Contact in the upper right corner.
-
The New Contact window will appear with the Contact Info tab open.
-
Enter the contact information in both tabs.
-
Click Add Contact to save your changes and close the window.
Note: The departments and user-defined fields are created and edited in Administration.
EDITING A CONTACT
-
Double-click on the contact you wish to edit.
-
The Contact Info window will appear.
-
Enter your changes.
-
Click Save Changes to update contact detail.
DELETING A CONTACT
-
Click on the three dots to the far right of the contact you wish to delete.
-
Select Delete from the menu.
-
Click Delete in the popup to confirm your deletion.
Viewing Customer Documents
You may view, upload, and delete customer documents through the Customer Details page.
-
Near the bottom of the Customer Options menu, click Documents
-
Documents associated with this customer will appear in the Customer Details page.
UPLOADING A DOCUMENT
-
Click the ADD FILE button in the top navigation.
-
The Add Files window will appear.
-
Select the files you wish to add.
-
Click ADD FILES to upload the files and close the window.
DELETING A DOCUMENT
- Click on the DELETE button in the top navigation to delete it.
Viewing Customer History
Exigo User Manual: Customer Maintenance

You may view customer history from the Customer Options menu.
Customer History
- Click on Account History under the Customer Options Menu.
Customer Details Toolbar
- From the Customer Details toolbar Click on the far right menu on the Customers Details toolbar.
Entering Inquiries
You may enter an inquiry, or an action tracking item for a customer through the Account History Screen.
-
Navigate to the Account History page described in the previous section.
-
Click on the Add Inquiry button in the upper right corner.
-
The Customer History window will appear.
-
Select the inquiry category.
Note: Inquiry categories are created in Administration.
-
Select the user that will own this inquiry. The selected user will see the inquiries in the Today page.
-
Enter a brief description for the inquiry.
-
Enter more details for the inquiry, especially if assigning to another user.
-
The status will be automatically set to open, but can be changed.
Note: Closed inquiries appear in a lighter font on the inquiry history list.
VIEWING INQUIRIES FROM CUSTOMER DETAILS
- Click on Account History under the Customer Options Menu.
My Actions
Exigo User Manual: Customer Maintenance

You may view a list of your action tracking items by clicking on the My Actions button in the Home Menu.
Note: Action tracking items, also known as inquiries, are created in the Customer section, and can be edited.
DEFINING REPORT CRITERIA
- You may select which action tracking items appear by clicking on the Report Criteria button in the My Actions
toolbar.
-
The Report Criteria window will appear.
-
Enter the start and end dates for the action tracking items.
-
Select how to sort the action items: by company, assigned to, assigned from, or category.
Note: Action Tracking Item status types are created in Administration.
-
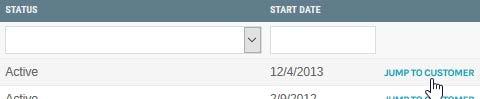
Select the status you wish to view; open, closed, or all.
-
Click Close to close the window and view the search results in the Actions page.
Viewing Payment History
You may view payment history by clicking on Payments under the Customer Options menu. Select the payment you
wish to view for additional details
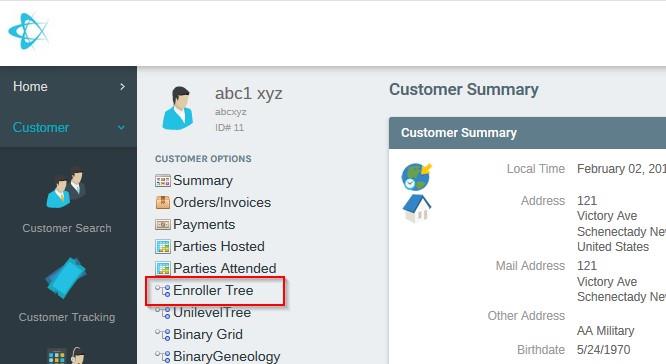
Viewing Customer Enroller Tree
You may view Customer Enroller Tree from the Customer menu.
- From the Customer Options Menu click on Enroller Tree.
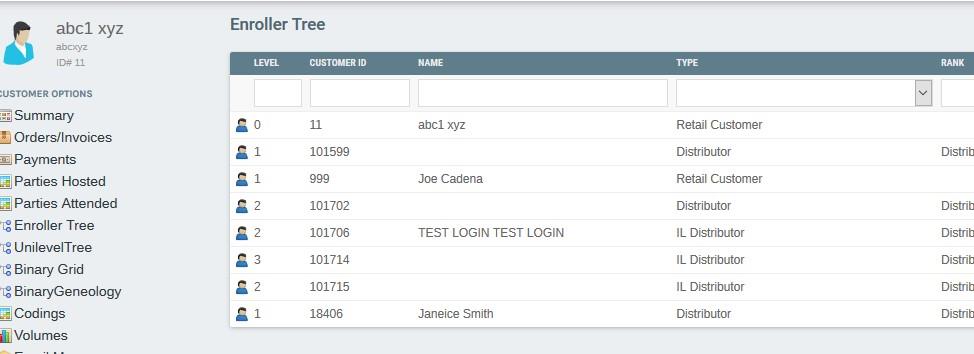
NAVIGATION UP THE TREE
Exigo User Manual: Customer Maintenance

- The Enroller Tree window will appear on the right side of the customer's details page.
You may navigate a customer Up the Enroller Tree from the Customer Details Toolbar menu.
-
Click on the customer ID number of the customer who will navigate up the Enroller Tree.
-
Click the Up Button
-
The Enroller Tree window will appear on the right side of the page with the navigation up the tree.
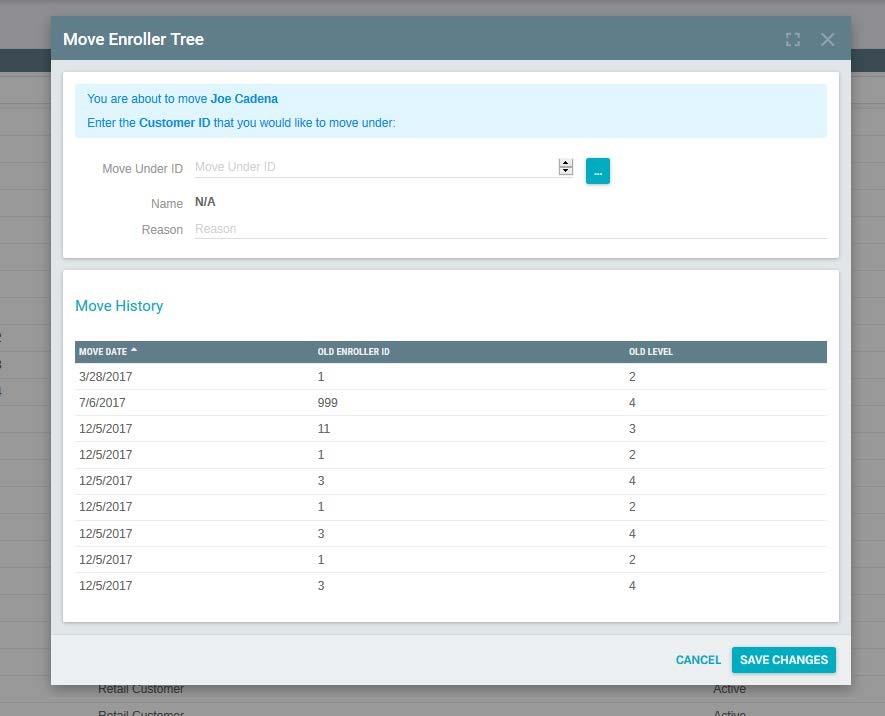
PERFORMING A TREE MOVE
You may perform a tree move from the Customer Details Toolbar menu.
-
Click on the customer ID number of the customer who will be moving in the Enroller Tree.
-
Click the Move Button

NAVIGATE THROUGH THE TREE
Exigo User Manual: Customer Maintenance

-
The Enroller Placement Move window will open.
-
In this screen you must enter the customer ID number of the customer you wish to move under.
-
You can Browse by clicking
Next to the move under box.
-
Enter the reason for the move then click OK
-
The Enroller Tree window will appear on the right side of the page with the move.
You may navigate through the tree in two different ways.
- The first way to navigate through the tree is to click on the Next on the top or bottom of the Enroller Tree.


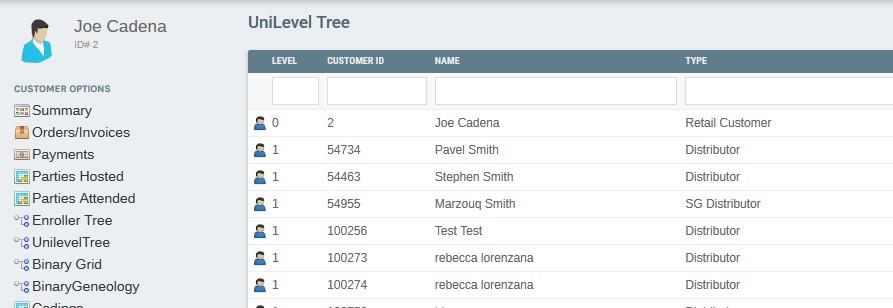
Viewing Customer Unilevel Tree
Exigo User Manual: Customer Maintenance

- The Second way to navigate through the tree is to click on the customer ID number.
You may view Customer Unilevel Tree from the Customer menu.
-
From the Customer Options Menu click on Unilevel Tree.
-
The Unilevel Tree window will appear on the right side of the customer's details page.


NAVIGATION UP THE TREE
Exigo User Manual: Customer Maintenance

-
Click on the customer ID number of the customer who will navigate up the Unilevel Tree.
-
Click the Up Button
-
The Unilevel Tree window will appear on the right side of the page with the navigation up the tree.
PERFORMING A TREE MOVE
You may perform a tree move from the Customer Details Toolbar menu.
-
Click on the customer ID number of the customer who will be moving.
-
Click on the Move button.
-
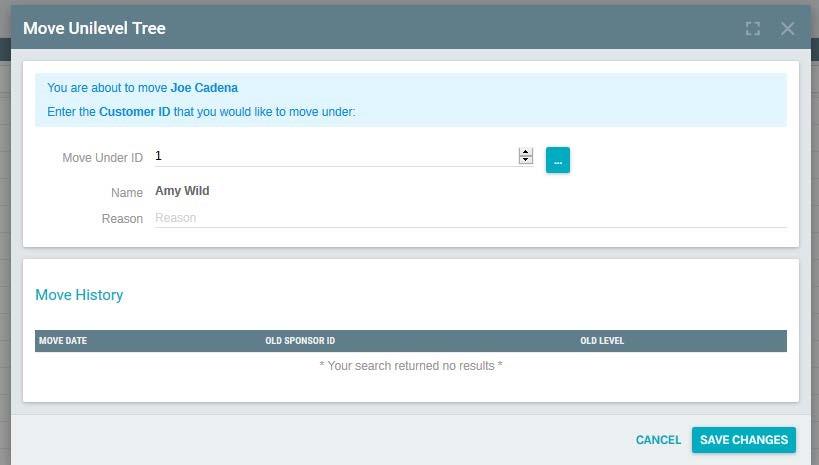
The Unilevel Placement Move window will open up.
-
In this screen you must enter the customer ID number of the customer you wish to move.
-
You can Browse by clicking
Next to the move under box.
-
Enter the reason for the move, click OK
-
The Unilevel Tree window will appear on the right side of the page with the move.


NAVIGATE THROUGH THE TREE
Exigo User Manual: Customer Maintenance

You may navigate through the tree in two different ways.
-
The first way to navigate through the tree is to click on the Next on the top or bottom of the Unilevel Tree.
-
The Second way to navigate through the tree is to click on the customer ID number.
Viewing Customer Binary Tree
You may view Customer Binary Tree from the Customer menu.
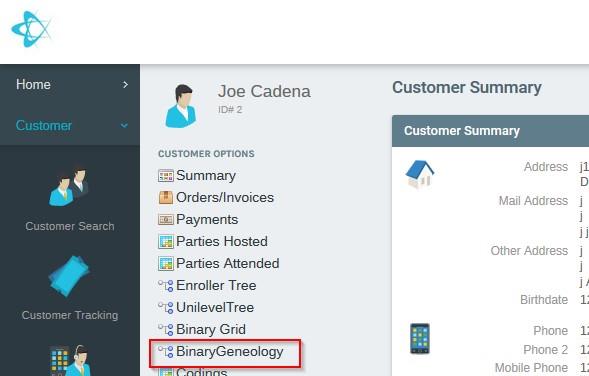
-
From the Customer Options Menu click on Binary Geneology.
-
The Binary Tree window will appear on the right side of the customer's details page.

NAVIGATION UP THE TREE
Exigo User Manual: Customer Maintenance

-
You may navigate a customer Up the Binary Tree from the Customer Details Toolbar menu.
-
Highlight the name of the customer who will navigate up the Binary Tree.
-
Click on the Up button.
-
The Binary Tree window will appear on the right side of the page with the navigation up the tree.
PERFORMING A TREE MOVE
-
You may perform a tree move from the Customer Details Toolbar menu.
-
Highlight the name of the customer who will move in the Binary Tree.
-
Click on the Move button.
-
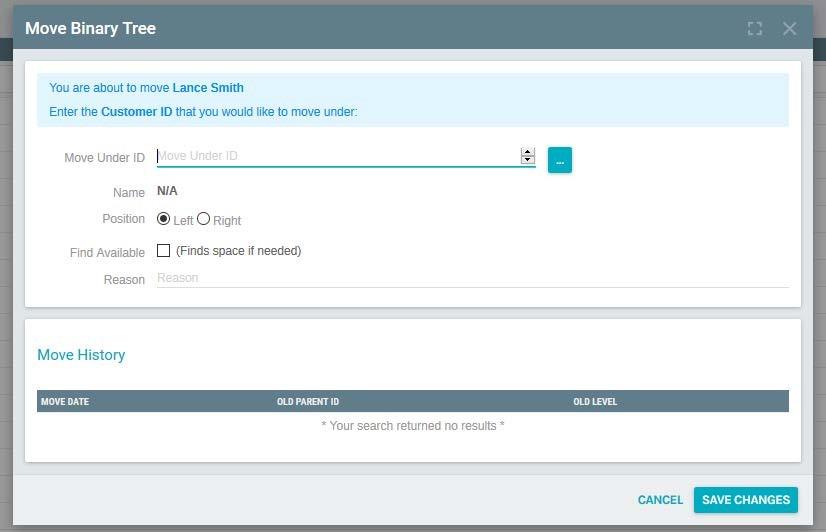
The Binary Move window will open up.
-
In this screen you must enter the customer ID number of the customer you wish to move.
-
You can Browse by clicking
Next to the move under box.
-
Click in circle next to desired position, left or right.
-
Enter the reason for the move, click OK
-
The Binary Tree window will appear on the right side of the page with the move.
NAVIGATE THROUGH THE TREE
Expand or Collapse Tree
To navigate in the Binary Tree you can expand or collapse the tree by clicking on the Face icons in the Binary Tree.


Viewing Customer Binary Grid
Exigo User Manual: Customer Maintenance

You may view Customer Binary Grid from the Customer menu.
-
From the Customer Options Menu click on Binary Grid.
-
The Binary Grid window will appear on the right side of the customer's details page.
NAVIGATION UP THE TREE
You may navigate a customer Up the Binary Grid from the Customer Details Toolbar menu.
-
Click on the Grid Box of the customer who will become the top of the Binary Grid.
-
Click on the Up button to see which customer is up from the chosen customer in the Binary Grid.
-
The Binary Grid window will appear on the right side of the page with the navigation up the tree. PERFORMING A TREE MOVE 1. You may perform a tree move from the Customer Details Toolbar menu. 2. Then click on the Grid Box of the customer who will be moving. 3. Click on the Move button. 4. The Binary Move window will open up. 5. In this screen you must enter the customer ID number of the customer you wish to move under. 6. You can Browse by clicking Next to the move under box. 7. Click in circle next to desired position, left or right. 8. Enter the reason for the move, click OK 9. The Binary Grid window will appear on the right side of the page with the move. NAVIGATE THROUGH THE TREE 1. Click on Customer ID Number 2. To navigate in the Binary Grid, you can navigate the tree by clicking on the Customer ID Number in the Grid Box. 3. Click on Customer Name 4. To navigate in the Binary Grid, you can also navigate the tree by clicking on the Customers name in the Grid Box. Report Builder You may use the report builder to create custom reports using different report fields, filters, sort orders, and options. Important: All orders and actions are date and time stamped. All days end and begin at Midnight (00:00), to include the current day in a report you must use the next calendar date as your report end date!
Report Builder Documentation
Exigo User Manual: Customer Maintenance

CREATE NEW REPORT
-
Click on the Reports button under the Accounting Menu on the left menu of the page.
-
Click on Build a Report in the upper right corner of the page.
-
Click on Create a New Report in the My Report section of the page.
-
The Report Designer screen will open to the Query tab.
-
Name the Report that is going to be created on the top of this page.
-
This is where the reports are created. You can enter the desired Report Fields, Filter, and Sort Order to build a
custom Report. See the following sections for additional details
REPORT FIELDS
Adding a Report Field
-
To Add a field to your report, click on the Add Field button.
-
The Add Field screen will open.
-
Check the box next to the desired field, then click add field Button or double the desired field.
-
To see additional fields, click ">" next to the parent folder.
-
The added fields will show up in the Report Designer screen.
Removing a Report Field
-
To Remove a field from your report, click the three dots to the right of the desired field, then click on Delete.
-
The Field will be removed from the Report Designer screens and will no longer be part of the report.
Editing a Report Field
-
To Edit a field in your report, click the three dots to the right of the desired field, then click on Edit.
-
The Report Field Setup screen will open and displays the following options:
-
Field Title
-
Optional Format
-
Allows Text Wraps
-
Subgroup Headers
-
Make edits to the Edit Field Properties screen and press OK.
Moving a Report Field Up
-
To move a Report Field Up in the report, click the "^" to the right of the desired field.
-
The Field will be moved up one space in the Report Designer screen.
Note: The order of Report fields in the Report Designer screen is the same order they will appear in the report.
Moving a Report Field Down
Exigo User Manual: Customer Maintenance

-
To move a Report Field Down in the report, click the "v" to the right of the desired field.
-
The Field will be moved down one space in the Report Designer screen.
Note: The order of Report fields in the Report Designer screen is the same order they will appear in the report.
REPORT FILTERS
Adding a Report Filter
-
To Add a filter to your report, click on the Add Filter button.
-
Click the arrow to scroll to the desired Field
-
Click the arrow to scroll to the desired Filter condition.
-
Enter a default value if needed.
-
Click OK
-
The added fields will show up in the Report Designer screen.
Removing a Report Filter
-
To Remove a filter from your report, click the three dots to the right of the desired filter, then click on Delete.
-
The filter will be removed from the Report Designer screens and will no longer be part of the report.
Editing a Report Filter
-
To Edit a filter in your report, click the three dots to the right of the desired filter, then click on Edit.
-
The Report Field Setup screen will open and allows you to edit values configured for this filter.
-
Click Save Changes when complete.
-
The Edited filter will show up in the Filter Section of the Report Designer screen.
Moving a Report Filter Up
-
To move a Filter Up in the report, click the "^" to the right of the desired filter.
-
The filter will be moved up one space in the Report Designer screen.
Note: The order of Report filter in the Report Designer screen is the same order they will appear in the report.
Moving a Report Filter Down
-
To move a Filter down in the report, click the "v" to the right of the desired filter.
-
The filter will be moved down one space in the Report Designer screen.
Note: The order of Report filters in the Report Designer screen is the same order they will appear in the report.
REPORT SORT ORDER
Exigo User Manual: Customer Maintenance

Adding a Report Sort Order
-
To Add a sort order to your report, click on the Add Sort Order button.
-
The Sort Field Setup screen will open.
-
Click the arrow to scroll to the desired Sort by Field.
-
Click the arrow to scroll to the desired Sort.
-
Click Add Field
-
The added Report Sort Order will show up in the Report Designer screen.
Removing a Report Sort Order
- To Remove a Sort Order from your report, click the three dots to the right of the desired Sort Order, then click
on Delete.
- The Sort Order will be removed from the Report Designer screens and will no longer be part of the report.
Editing a Report Sort Order
-
The Edit Sort Order screen allows you to edit the Sort information in a report.
-
To Edit a sort order in your report, click the three dots to the right of the desired sort order, then click on Edit.
-
The Sort Field Setup screen will open and allows you to edit values configured for this Sort Order.
-
Click Save Changes when complete.
-
The Edited Report Sort Order will show up in the Report Designer screen.
Moving a Report Sort Order Up
-
To move a Sort Order Up in the report, click the "^" to the right of the desired Sort Order.
-
The Sort Order will be moved up one space in the Report Designer screen.
Note: The order of Report Sort Order in the Report Designer screen is the same order they will appear in the report.
Moving a Report Sort Order Down
-
To move a Sort Order down in the report, click the "v" to the right of the desired Sort Order.
-
The Sort Order will be moved down one space in the Report Designer screen.
Note: The order of Report Sort Order in the Report Designer screen is the same order they will appear in the report.
REPORT OPTIONS TAB
Exigo User Manual: Customer Maintenance

In the Report Designer Screen, the Report can be refined under the Options Tab.
The Options Tab allows you to:
-
Display Details in a variety of Rows and/or Columns.
-
Return a maximum number of rows
-
Group Fields as Headers
-
Display Record Count on Sub Groups.
SHARING A REPORT
In the Report Designer Screen, the Report can be shared under the Sharing Tab.
-
Click Add User
-
Select the User(s) to share this report with by placing a check mark next to their User.
-
Click Add User
CREATING THE FINISHED REPORT
- When all sections are completed with the desired Report fields, Filters, Order Sorts, and Options on the
Report Designer Screen Click SAVE and the Report will be generated.
Important: All orders and actions are date and time stamped. All days end and begin at Midnight (00:00), to include
the current day in a report you must use the next calendar date as your report end date!
COPY EXISTING REPORT
You can Copy an existing report under a different Report Name and Edit it to build a new report.
-
Click on the Reports button under the Accounting Menu on the left menu of the page.
-
Click on Build a Report in the upper right-hand corner of the Accounting Reports page.
-
Click on Report that is to be copied in the My Report section of the Company Reports page.
-
The Report will be generated, and the Report Screen will open.
-
To Copy the Report, click on the Copy Report Button at the bottom of the window.
-
The Report Designer Screen will open with the words "Copy of (and the Report name)" in the report name
section of the screen.
-
Edits can be made from the Report Designer Screen or an exact Copy can be made and saved.
-
Click on Save and a New Copy of an existing report or a new Edited Report will be Generated. IMPORT REPORTS, SHARED, AND TEMPLATES You can Import an existing report, shared reports, and templates into the Report Designer Screen to Edit or build on an existing report.
EXPORTING DATA FROM A REPORT
Exigo User Manual: Customer Maintenance

-
Click on the Reports button under the Accounting Menu on the left menu of the page.
-
Click on Build a Report in the upper right-hand corner of the Accounting Reports page.
-
Click on Create a New Report in the My Report section of the Company Reports page.
-
The Report Designer screen will open to the Query section.
-
Name the Report that is going to be imported.
-
Click the Import Button at the bottom of this window.
-
A list of reports you can use to import from will display.
-
Click Import next to the report you would like to use.
-
The reports, shared reports, or templates will be imported into the Report Designer Screen.
-
Click Save and the report will be generated.
You can export data report to an Excel file.
-
Click on the Reports button under the Accounting Menu on the left menu of the page.
-
Click on Build a Report in the upper right-hand corner of the Accounting Reports page.
-
Click on Report that is to be Exported in the My Report section of the Company Reports page.
-
The screen will open the generated report.
-
The Report can be exported be clicking the Export to Excel Button at the bottom of the window.
REMOVING A REPORT
You can remove a report from the system.
-
Click on the Reports button under the Accounting Menu on the left menu of the page.
-
Click on Build a Report in the upper right-hand corner of the Accounting Reports page.
-
Click on the Report that is to be Removed.
-
The screen will open to the generated report.
-
Clicking the Edit Button at the bottom of this window.
-
The Report Designer screen will open to the Query section.
-
To Delete the Report, click the Trash Can icon at the bottom of the window.
-
Click Delete in the pop-up window.
-
The Report will be removed from the system.