Exigo Admin 1099's
Exigo Admin 1099 Functionality
-
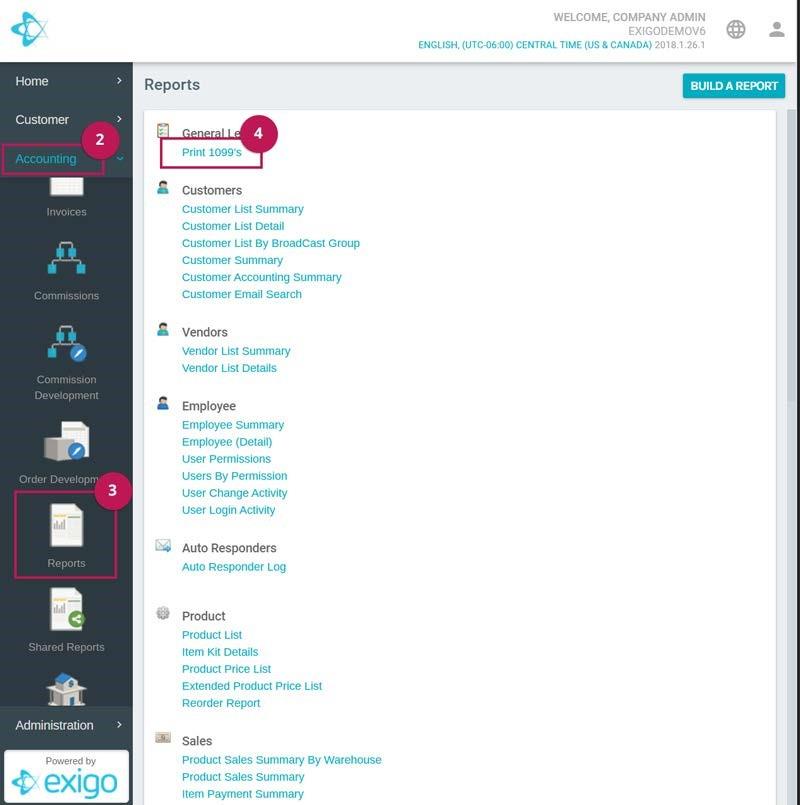
Login to the Exigo Admin site.
-
Go to the Accounting tab.
-
Scroll down and select Reports.
-
On the Reports screen, under the General Ledger Section, select the Print 1099's link.
-
After selecting Print 1099's, a modal will pop-up.
EXPORTING THE REPORT
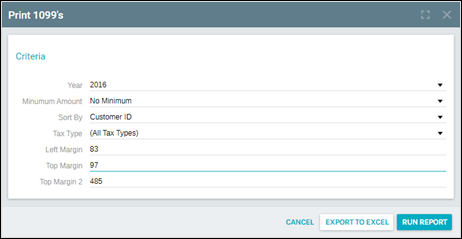
This modal will allow you to set the parameters for the 1099 report.
-
Year: Select the tax year desired.
-
Minimum Amount: Select a minimum amount requirement. ($600 or No Minimum)
-
Sort By: Order the report by either Tax ID or Customer ID.
-
Tax Type: Select the Tax Type desired. (i.e., EIN, SSN)
-
Left Margin: Indicate the margin rule for the left of the page. (PDF Only)
-
Top Margin: Indicate the margin rule for the top of the page. (PDF Only)
-
Top Margin 2: Indicate the margin rule for the top of the second form. (PDF Only)
-
EXPORT TO EXCEL -This function will export the indicated 1099k data into an excel spreadsheet with the
following information
-
Company Name
-
Company Address1
-
Company Address2
-
Company City
-
Company State
-
Company Zip
-
Company Phone
-
Vendor Id
-
Vendor FirstName
-
Vendor MiddleName
-
Vendor LastName
-
Tax Name
-
Vendor Address1
-
Vendor Address2
-
Vendor City
-
Vendor State
-
Vendor Zip
-
Vendor Country-
Vendor TaxId
-
Vendor Amount
-
Other Amount
-
Company FIN
-
Utilize1099DirectSalesFlag
-
TaxNameTy
-
Vendor Company
-
RUN REPORT - This functionality will generate a PDF with the information needed for the 1099 form
template. Users will have to adjust the margin parameters accordingly. Margin parameters may vary
depending on the browser and the source of the 1099 form printout.

ADDITIONAL INFORMATION
-
The 1099 report gets populated from the Vendor, VendorBill, and VendorPayment tables.
-
Other Income amount (Box 3 in the 1099 form) will be populated based on a flag in the VendorBill table.
Vendor Bills will be considered as other income when the flag IsOtherIncome equals 1. Otherwise, when the
flag equals 0, the Vendor Bill amount will fall under Nonemployee compensation, which populates box 7 in
the 1099 form.
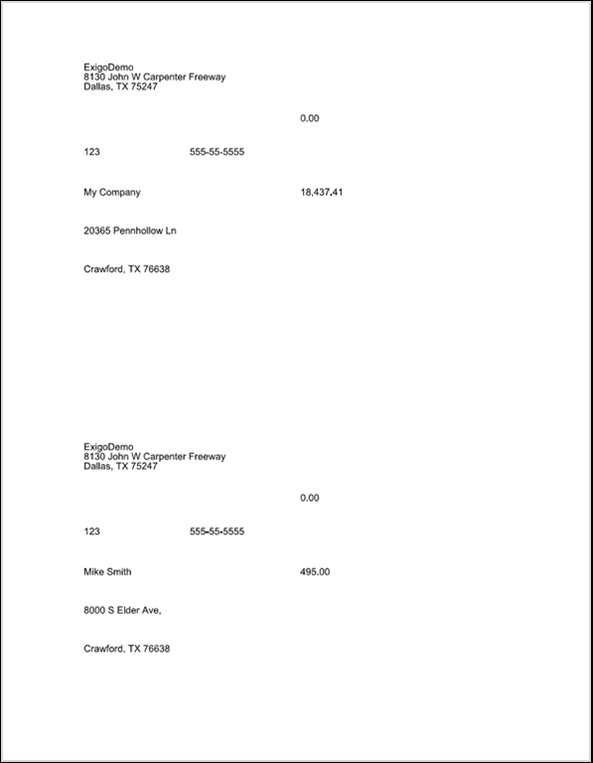
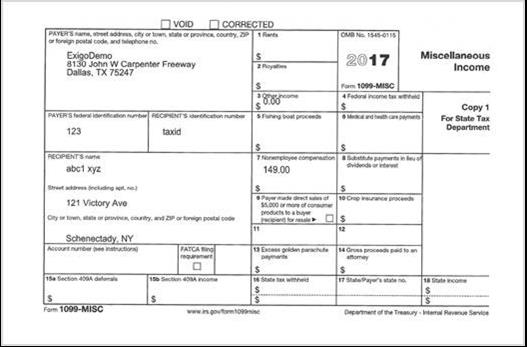
- Example of PDF printed on 1099 form:
BOX 9 FEATURE ON THE 1099-MISC FORM
This feature, if enabled, will select this check box for any customer who received over $5000.
By default, this box will NOT be selected. If you would like this feature enabled, please open a support ticket and
request that we make the appropriate adjustments for you.
Box 9 has the following text;
Payer made direct sales of $5,000 or more of consumer products to a buyer (recipient) for resale
Reference: https://www.irs.gov/instructions/i1099msc/ar01.html#d0e1173
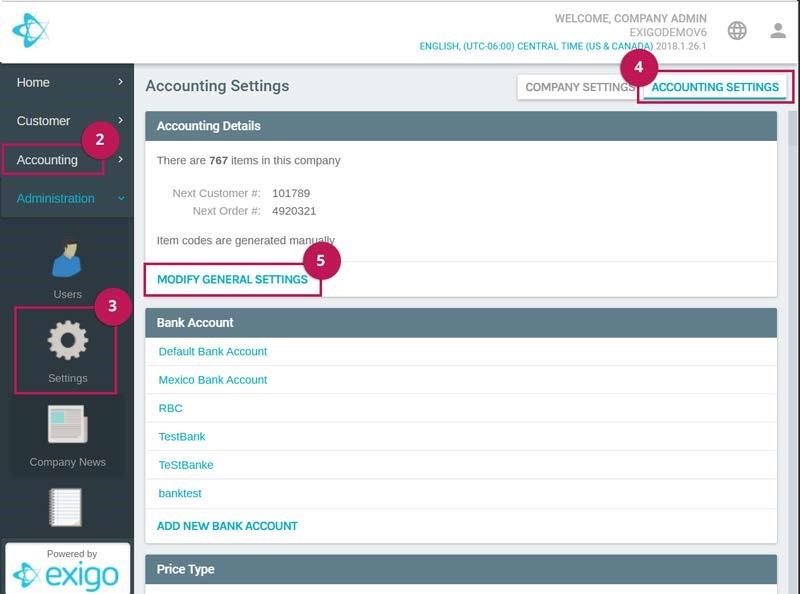
STEPS TO SET UP CORPORATE TAX NUMBER (FIN) IN EXIGO ADMIN
-
Log in to the Exigo Admin site.
-
Go to the Administration tab.
-
Select Settings.
-
On the Settings screen, select the Accounting Settings tab on the top right.
-
Go to the Accounting Details Section, and select the Modify General Settings link.
-
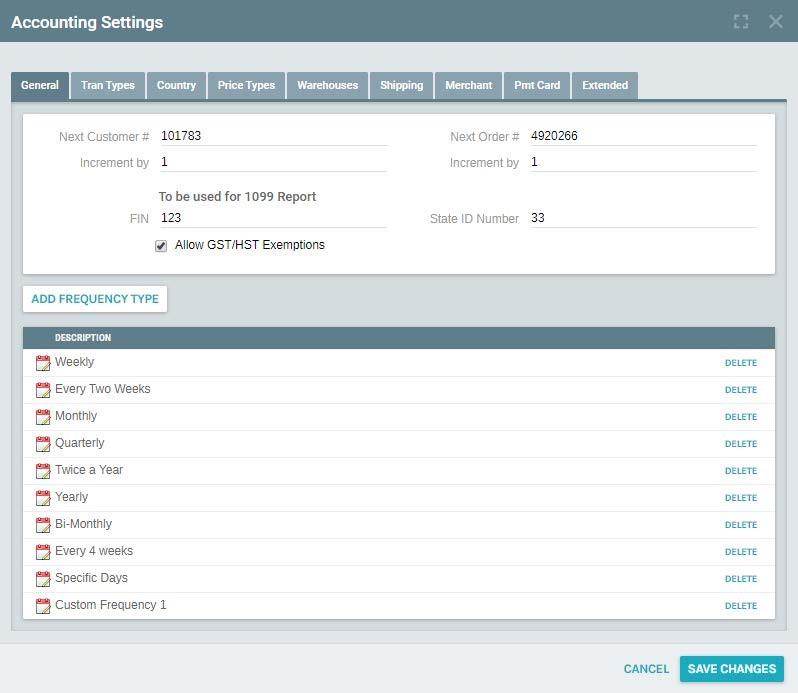
The Accounting Settings modal will display.
-
In the General tab, you will see the following fields:
-
FIN - Corporate Tax Number
-
State ID Number
-
Allow GST/HST Exemptions (Checkbox)