Back Office Configuration > Company Social Networks
Overview
The Company Social Networks section, accessible from Company Portal > Back Office Configuration > Settings, allows administrators to configure the social media links that appear in the distributor Back Office portal. Each entry can be restricted by language and customer type, giving full control over which social networks are visible to which distributors.
Navigating to Company Social Networks
- Log in to the Exigo admin panel.
- In the left sidebar, expand the Company Portal section.
- Click Back Office Configuration.
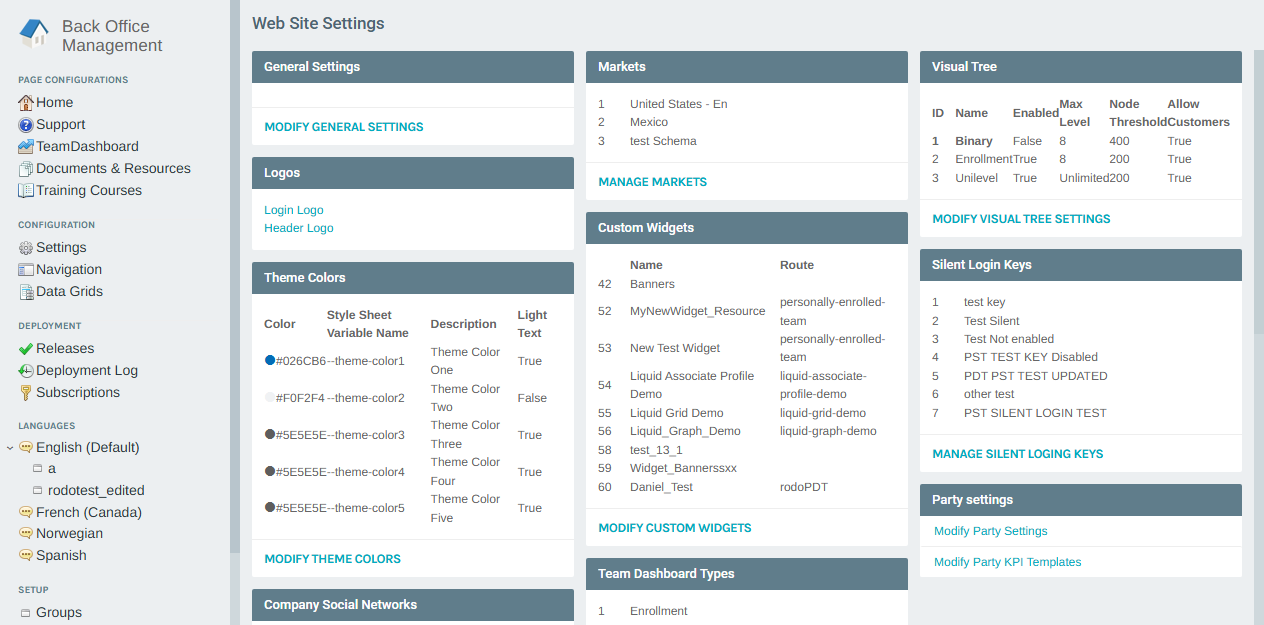
The Back Office Management portal opens.
- In the Configuration section of the left menu, click Settings.
- On the Web Site Settings page, scroll to the Company Social Networks section.
- Click MODIFY COMPANY SOCIAL NETWORKS.
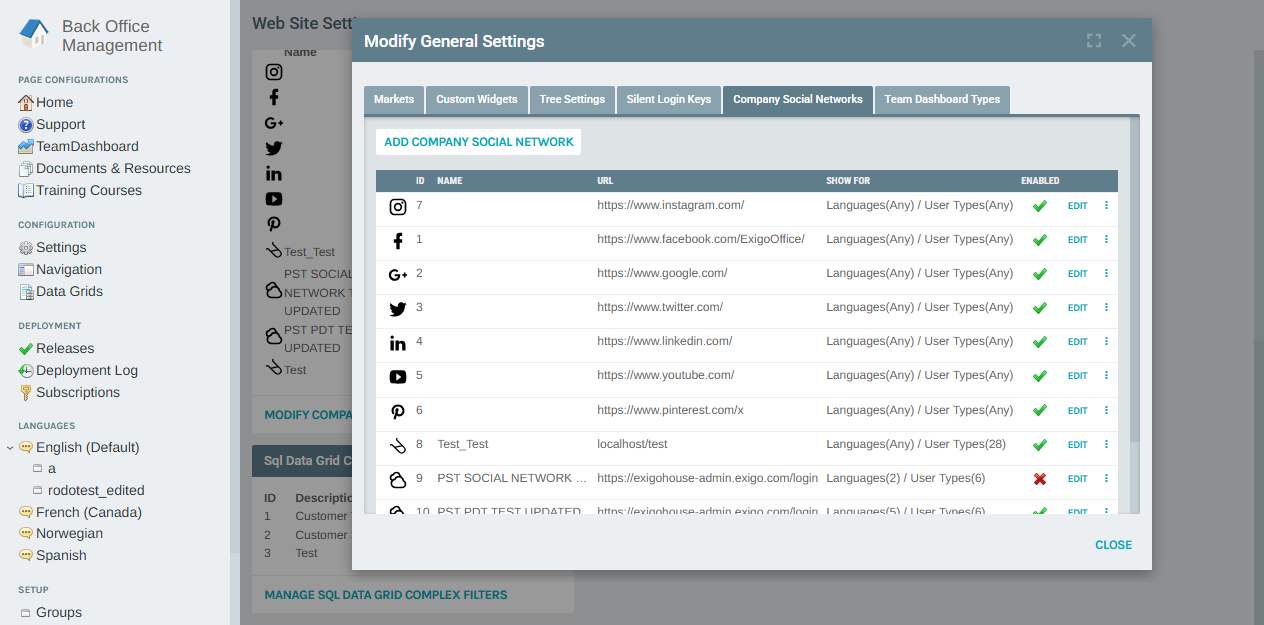
The Modify General Settings popup opens directly on the Company Social Networks tab.
Company Social Networks Tab
The tab displays all configured social network links in a sortable grid.
| Column | Description |
|---|---|
| (Icon) | The social network icon or custom SVG image |
| ID | Unique identifier for the entry |
| Name | Optional custom label (blank for standard networks) |
| URL | The destination URL for the social media link |
| Show For | Language and Customer Type filters controlling visibility |
| Enabled | Green checkmark = active; red X = disabled |
Adding a Company Social Network
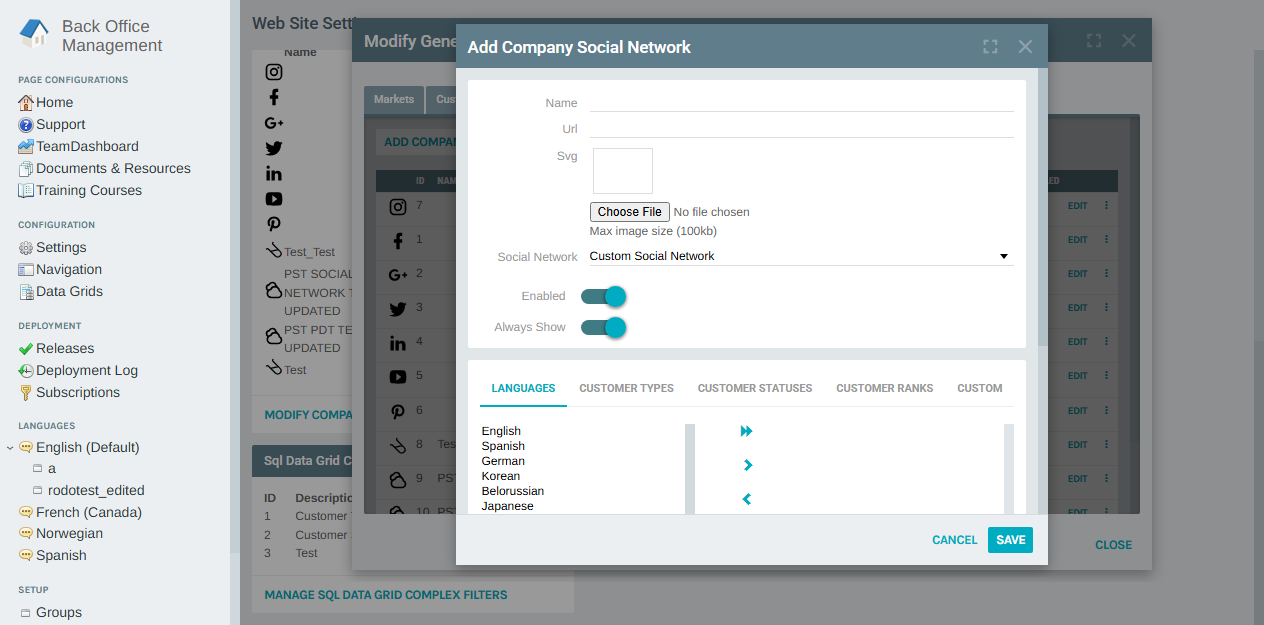
Click ADD COMPANY SOCIAL NETWORK to open the add form.
| Field | Description |
|---|---|
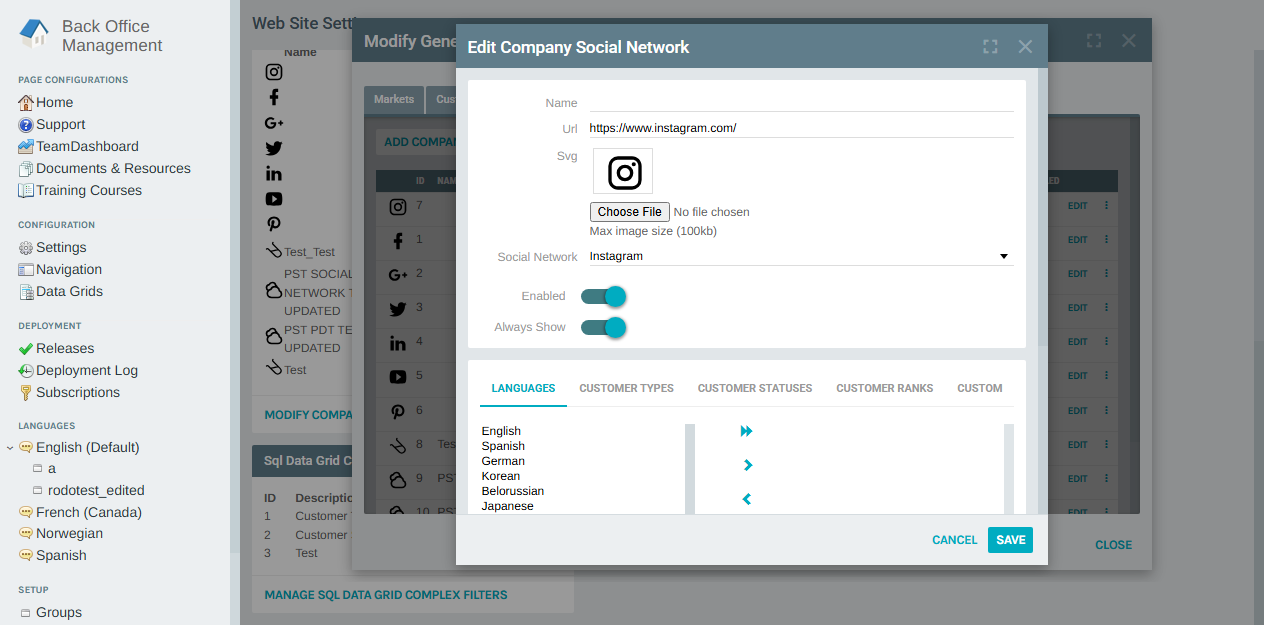
| Name | Optional custom display label for the link |
| URL | The full URL the link points to (e.g., https://www.instagram.com/) |
| SVG | Upload a custom icon image (max 100 KB) |
| Social Network | Select from the built-in network types (e.g., Instagram, Facebook, Custom) |
| Enabled | Toggle on/off to show or hide the link in the portal |
| Always Show | When enabled, the link is shown regardless of language or user type filters |
| Languages | Filter which languages can see this link (use arrows to move to the selected list) |
| Customer Types | Filter which customer types can see this link |
| Customer Statuses | Filter by customer status |
| Customer Ranks | Filter by customer rank |
| Custom | Apply a custom filter expression |
Click SAVE to create the entry, or CANCEL to discard.
Editing a Company Social Network
Click EDIT on any row in the list to open the edit form with the existing values pre-filled.
The edit form contains the same fields as the add form. Make your changes and click SAVE.
Deleting a Company Social Network
Click the ⋮ (more options) button on any row and select Delete to permanently remove that social network entry.
Note: Deletion is immediate and cannot be undone. Confirm the entry is no longer needed before deleting.
Reordering Social Networks
Use the expand_more / expand_less arrows that appear in the ⋮ menu to move an entry up or down in the display order. The order set here determines the order the links appear in the distributor Back Office portal.
Summary
| Feature | Description |
|---|---|
| Location | Company Portal > Back Office Configuration > Settings > Modify Company Social Networks |
| Purpose | Configure social media links shown in the distributor Back Office portal |
| Visibility control | Filter each link by language, customer type, status, rank, or custom rule |
| Icon support | Use built-in network icons or upload a custom SVG (max 100 KB) |
| Ordering | Links can be reordered using the up/down controls in the row menu |