Configuring Customer Types (Admin)
This guide explains how to create, edit, and manage Customer Types in Exigo Admin. Customer Types classify customers (e.g., Distributor, Preferred Customer, Employee) and control behavior such as pricing, enrollment eligibility, and commission plan participation.
Overview
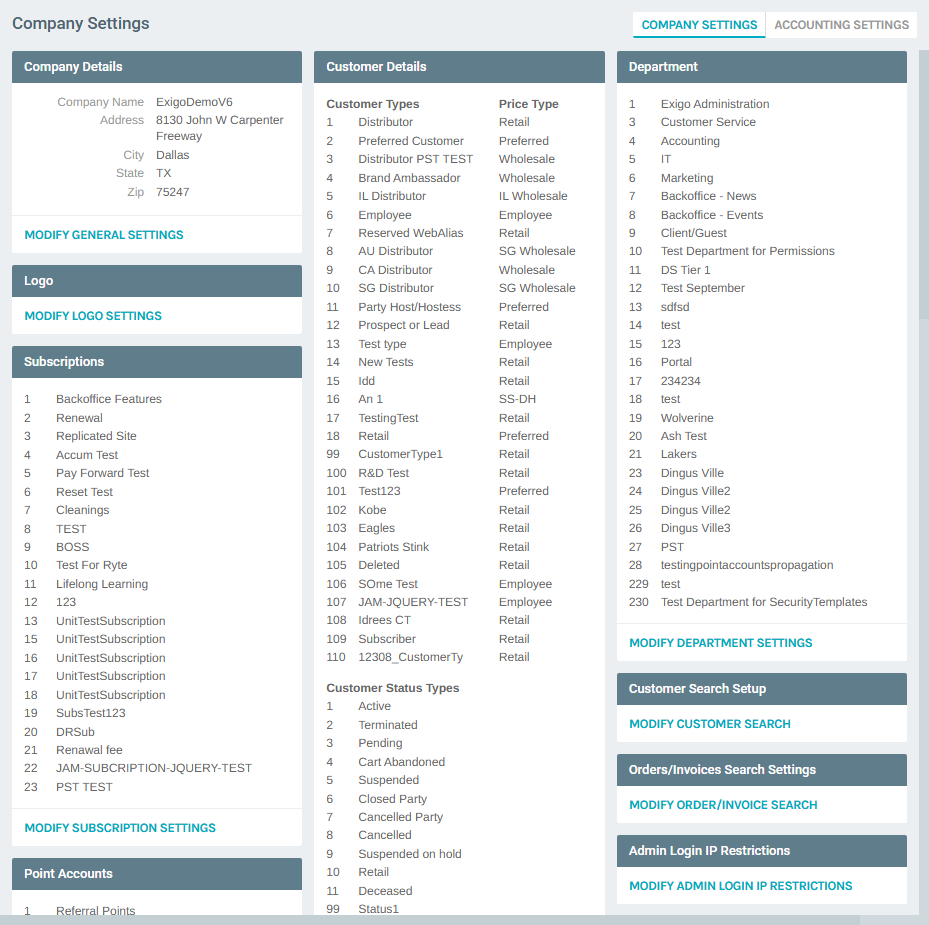
Customer Types are found under Administration > Settings > Company Settings, inside the Customer Details section. Each type has a numeric Type ID, a Description, a linked Price Type, and several behavioral flags.
Step-by-step
1) Navigate to Settings
- In the left navigation sidebar, expand Administration
- Click Settings
- The Company Settings page loads
2) Locate the Customer Details Section
On the Company Settings page, the middle column shows the Customer Details card. It contains:
- A Customer Types table listing all existing types with their Type ID, Description, and associated Price Type
- A Customer Status Types table below it
At the bottom of that card is the MODIFY CUSTOMER SETTINGS button.
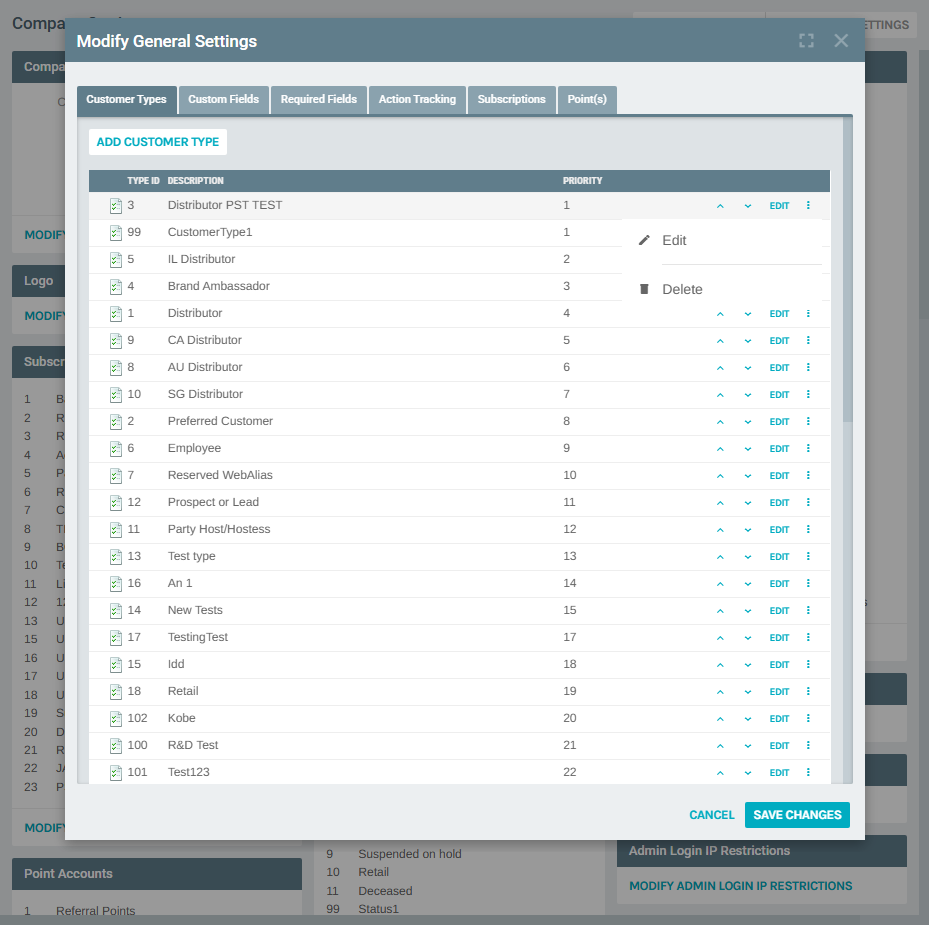
3) Open the Modify Customer Settings Popup
Click MODIFY CUSTOMER SETTINGS to open the Modify General Settings popup. It opens on the Customer Types tab by default.
The popup has the following tabs:
| Tab | Description |
|---|---|
| Customer Types | Add, edit, reorder, and delete customer types |
| Custom Fields | Define custom data fields for customers |
| Required Fields | Mark fields as required on customer forms |
| Action Tracking | Configure action tracking behavior |
| Subscriptions | Manage available subscription options |
| Point(s) | Configure point account settings |
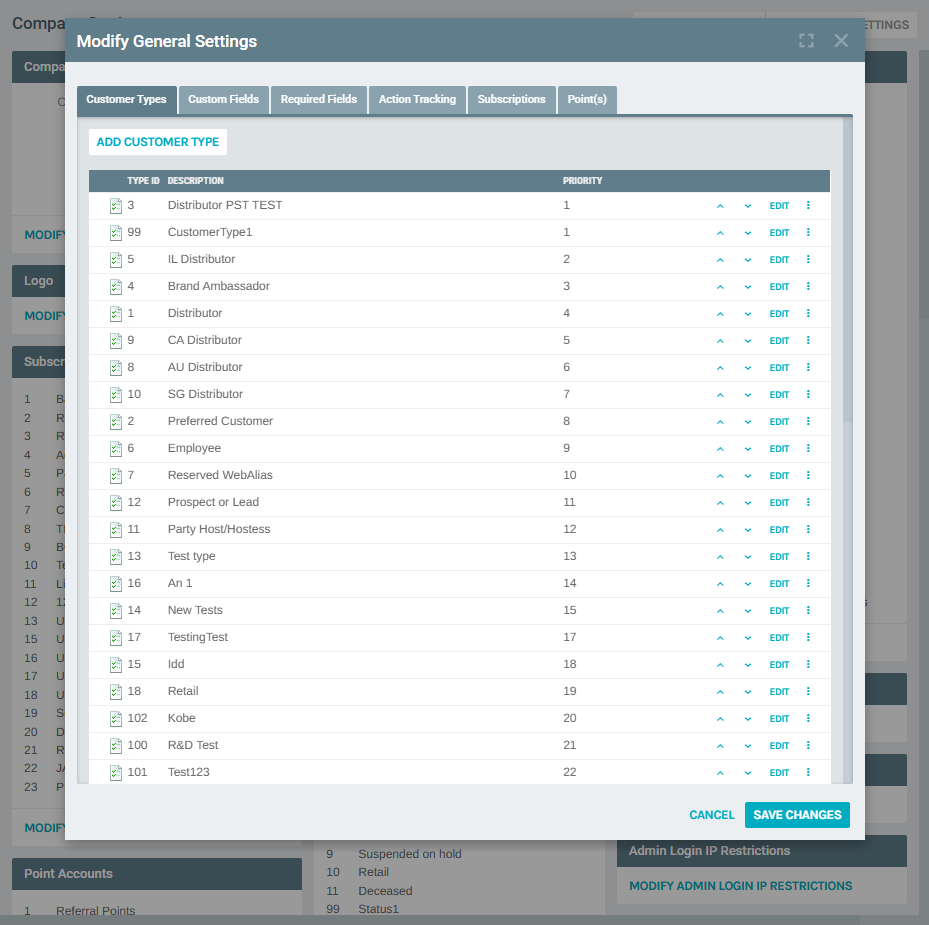
The Customer Types table has the following columns:
| Column | Description |
|---|---|
| Type ID | Unique numeric identifier stored in the database |
| Description | Display name shown throughout the admin and APIs |
| Priority | Display order; lower numbers appear first |
| Arrow buttons | Move the type up or down in priority |
| EDIT button | Opens the edit form for that type |
| Three-dot menu | Access Edit or Delete actions |
4) Add a New Customer Type
Click ADD CUSTOMER TYPE at the top of the list to open the Customer Type Setup form.
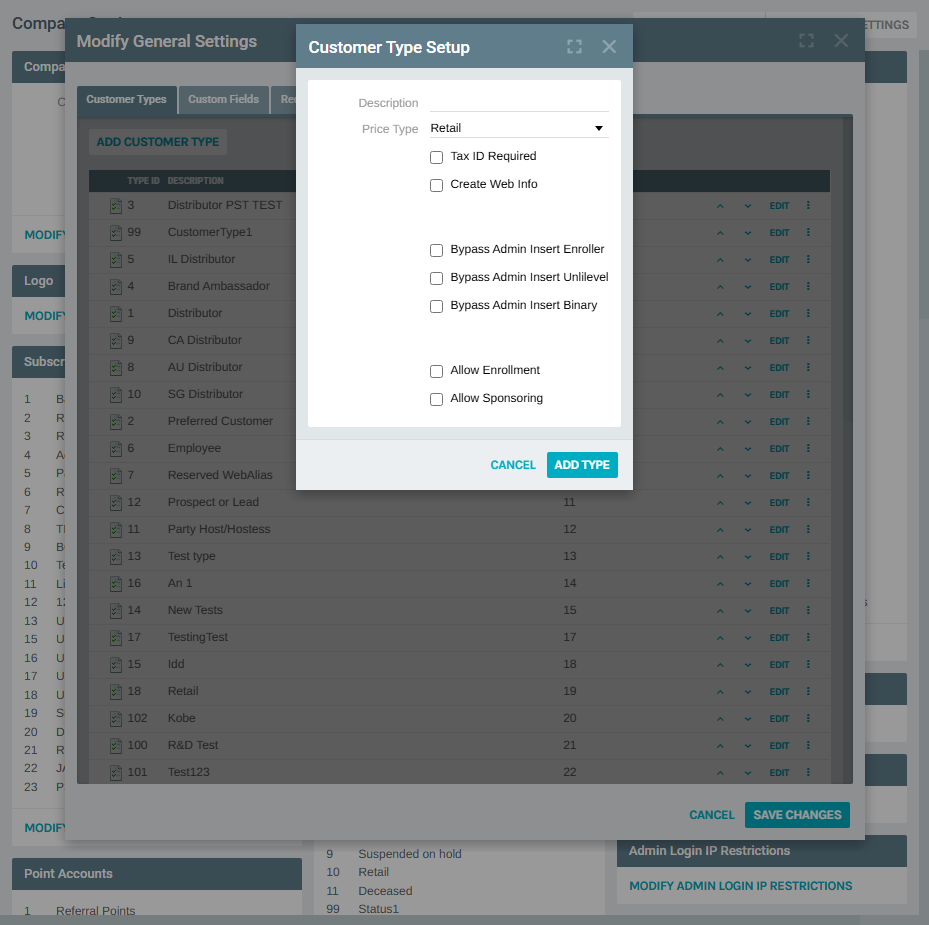
Fill in the fields:
| Field | Description |
|---|---|
| Description | Display name for the customer type (required) |
| Price Type | The price type applied to orders for this customer type |
| Tax ID Required | If checked, customers of this type must provide a Tax ID |
| Create Web Info | If checked, a web alias/replicated site record is automatically created |
| Bypass Admin Insert Enroller | Skips enroller assignment when created via Admin |
| Bypass Admin Insert Unilevel | Skips unilevel placement when created via Admin |
| Bypass Admin Insert Binary | Skips binary placement when created via Admin |
| Allow Enrollment | Allows this type to enroll new customers |
| Allow Sponsoring | Allows this type to sponsor other customers |
Click ADD TYPE to save, or CANCEL to discard.
5) Edit an Existing Customer Type
From the Customer Types list, either:
- Click the EDIT button directly on the row, or
- Click the three-dot menu (⋮) on any row and select Edit
The Customer Type Setup form opens pre-populated with the existing values. In addition to the fields described above, the edit form also shows:
| Field | Description |
|---|---|
| Default Login Profile | Default admin login profile ID assigned to this type |
| Default Login Web | Default web login profile ID assigned to this type |
| Default Rank | The starting rank automatically assigned on creation |
| Entity Template | Template ID used when generating entity records |
| Priority | Current display priority (can be changed directly) |
| Is Retail | Marks this type as a retail (non-distributor) customer type |
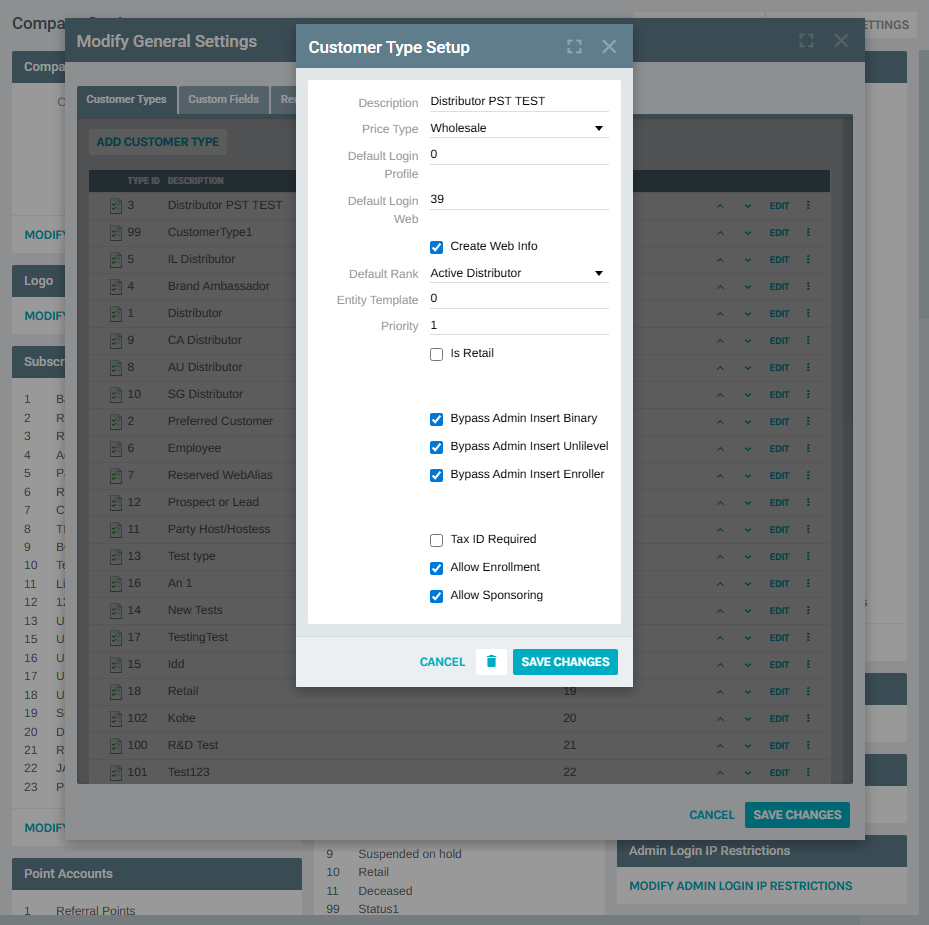
Click SAVE CHANGES to apply, or CANCEL to discard. The delete (trash) icon in the footer permanently removes the customer type.
6) Reorder Customer Types
Use the ▲ (Move Up) and ▼ (Move Down) arrow controls on each row to adjust the display order. The Priority column reflects the current order. Click SAVE CHANGES on the outer popup to persist the new order.
7) Delete a Customer Type
Click the three-dot menu on any row and select Delete, or use the trash icon inside the edit form. Deleting a customer type that is currently assigned to active customers may cause unexpected behavior — confirm no customers are using the type before deleting.
Notes
- The Type ID is set automatically and cannot be changed after creation
- Customer Types determine which Price Type is used for orders placed by that customer
- The Priority field controls display order in dropdowns and lists throughout the system
- Customer Type data is accessible through the Exigo API via the
CustomerTypeIDfield on customer records