Creating Company News (Admin)
This guide explains how to create a Company News item in Exigo Admin. Company News entries appear on the Admin home page dashboard and, optionally, in the back-office portal for distributors or staff.
Overview
Company News allows administrators to publish internal announcements and updates that are surfaced in two places:
- Exigo Admin home page – visible to admin users when they sign in (controlled per news item)
- Back-office portal – visible to distributors or staff (controlled per news item)
Each news item can be scoped by department, so you can target specific teams or make it available to all users.
Step-by-step
1) Navigate to the Company News List
- In the left navigation sidebar, expand Administration
- Click Company News
- The Company News list page will load, displaying all existing news items with their Title, Available in Backoffice, Available in Admin, and Created Date columns
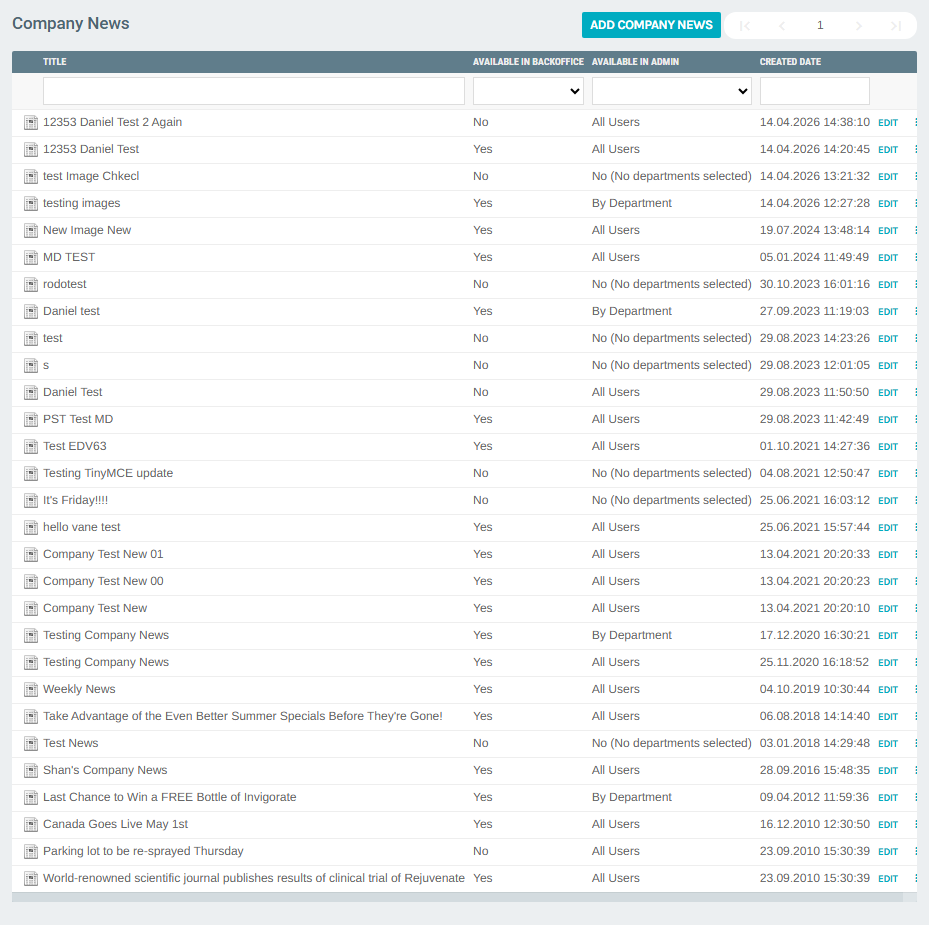
The list also provides:
- ADD COMPANY NEWS button at the top to create a new news item
- A search/filter row below the column headers to filter by title, backoffice availability, or admin availability
- An EDIT link on each row to open and modify an existing item
- A ⋮ (more) menu on each row with quick actions: Edit, Launch (preview), Email (send to users), and Delete
2) Click "Add Company News"
- Click the ADD COMPANY NEWS button at the top right of the list
- The Company News Setup form opens
The form has two tabs:
- Message – where you write the news title and body content
- News Item Settings – where you configure visibility and department targeting
3) Fill in the Message Tab
The Message tab is active by default.
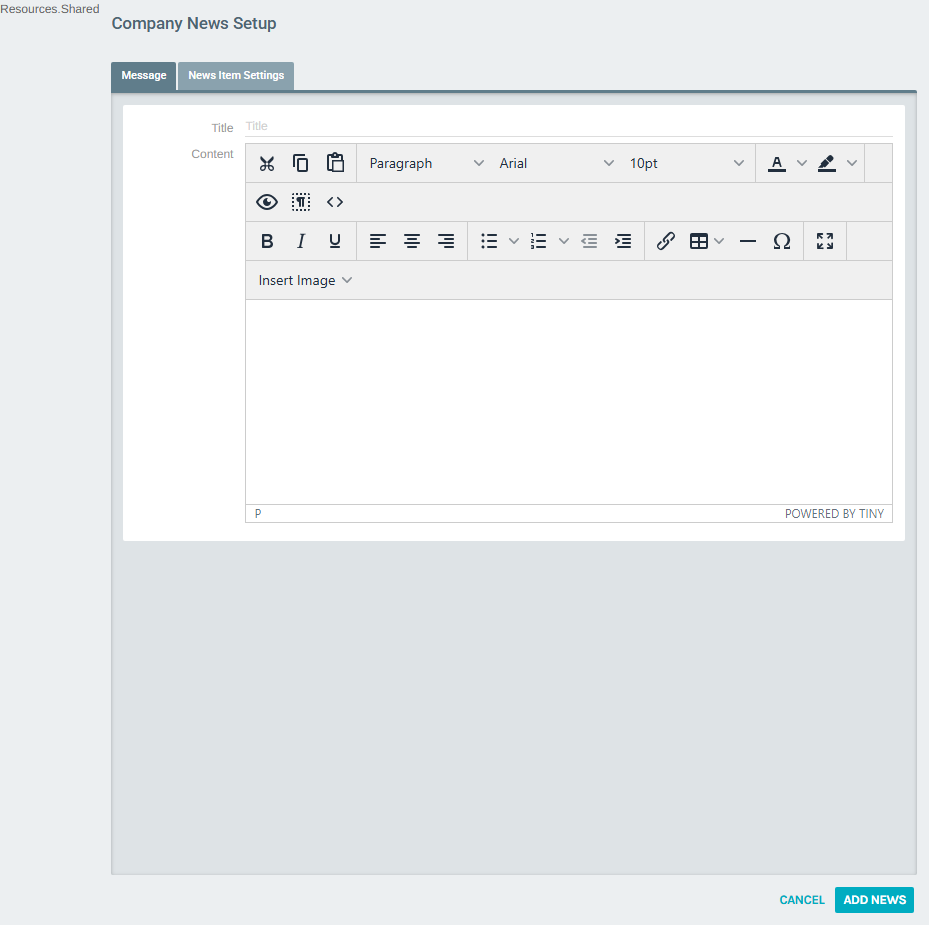
Fill in the following fields:
| Field | Description |
|---|---|
| Title | The headline of the news item (shown in the list and on the home page) |
| Content | The body of the news item. Uses a rich-text editor (TinyMCE) supporting formatting, links, tables, images, and HTML source editing |
Rich-Text Editor Toolbar
The Content editor includes a full formatting toolbar:
- Cut / Copy / Paste – clipboard operations
- Formats – paragraph styles (Paragraph, Heading 1–4, etc.)
- Font and Font Size – typography settings
- Text Color / Background Color – highlight and color controls
- Preview / Show Blocks / Source Code – view modes
- Bold / Italic / Underline – inline formatting
- Align Left / Center / Right – paragraph alignment
- Bullet List / Numbered List / Indent – list and indentation controls
- Insert/Edit Link – hyperlinks
- Table – insert and manage tables
- Horizontal Line / Special Character – decorative elements
- Fullscreen – expand the editor to full screen
- Insert Image – embed images directly into the news body
4) Configure the News Item Settings Tab
Click the News Item Settings tab to control who can see this news item.
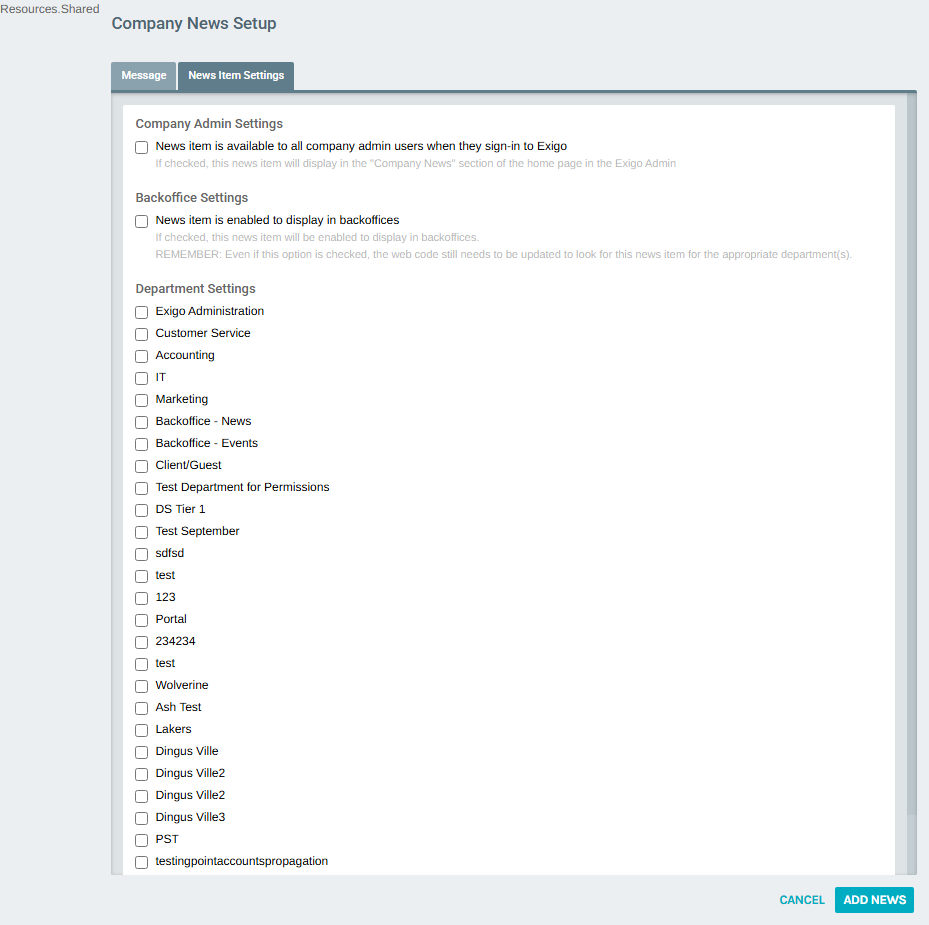
Company Admin Settings
| Option | Description |
|---|---|
| News item is available to all company admin users when they sign-in to Exigo | When checked, this item appears in the "Company News" section on the Exigo Admin home page for all admin users |
Backoffice Settings
| Option | Description |
|---|---|
| News item is enabled to display in backoffices | When checked, this news item is made available for display in distributor/customer back-office portals. Note: the back-office web code must also be configured to look for this item in the appropriate department(s) |
Department Settings
A checklist of all configured departments is shown below the two main toggles. Check one or more departments to restrict the news item to specific audiences. If no departments are selected but the backoffice option is enabled, the item will show as "No (No departments selected)" in the list.
Examples of department options:
- Exigo Administration – internal Exigo admin team
- Customer Service – customer-facing support staff
- Accounting – finance department
- IT – technical team
- Marketing – marketing team
- Backoffice - News / Backoffice - Events – back-office portal sections
- (and any other custom departments configured for your company)
5) Save the News Item
- After completing the Message and News Item Settings tabs, click ADD NEWS at the bottom right of the form
- The item is created and you are returned to the Company News list, where the new entry appears at the top
- Click CANCEL to discard and return to the list without saving
Managing Existing News Items
From the Company News list, each row has:
- EDIT – opens the news item in edit mode with the same two-tab form
- ⋮ (more) dropdown menu with additional actions:
- Edit – same as clicking EDIT
- Launch – opens a preview of the news item
- Email – sends the news item to selected recipients via email
- Delete – permanently removes the news item
Notes
- The Title is required. The news item will not save without one
- The rich-text Content editor supports images — use Insert Image to embed media directly in the news body
- The Available in Admin column in the list shows All Users if the admin checkbox is checked, No (No departments selected) if backoffice is enabled but no departments are selected, or By Department if specific departments are chosen
- Back-office visibility requires both the Backoffice Settings checkbox AND at least one department selected — plus the back-office web code must be updated to surface that department's news feed